| المجموعات الإجتماعية |
| البحث |
| مشاركات اليوم |
 |
| قسم الطيران اللاسلكي AIRCRAFT R/C مناقشات عامه تجارب ودروس تقارير استفسارات راجع فهرس القسم قبل طرح موضوعك >> فهرس قسم الريموت |
| موضوع مغلق |
|
|
أدوات الموضوع |
 |
| قسم الطيران اللاسلكي AIRCRAFT R/C مناقشات عامه تجارب ودروس تقارير استفسارات راجع فهرس القسم قبل طرح موضوعك >> فهرس قسم الريموت |
| موضوع مغلق |
|
|
أدوات الموضوع |
| مشاركة [ 1 ] | ||||
|
||||
|
|
ين
If you are a normal person — you know... اذا انت شخص عادي -- انت تعرف... one who's awake during the day and asleep at night, then it should be about 6 am. Take a shower then impatiently eat a good meal while you look forward to building your excellent new toy. منظمة الصحة العالمية واحد خلال اليوم مستيقظا ونائما في الليل ، ومن ثم ينبغي ان يكون حوالى الساعة 6 صباحا. اخذ دش ثم الصبر وجبة الطعام جيدا حين كنت اتطلع الى بناء الممتازة الخاصة بك لعبة جديدة. Note that the first image(s) for each step are the grayscale images from the Raptor V2 instruction manual. نلاحظ أن الصورة الاولى (ق) وفي كل خطوة من الخطوات هي بالتدرج الرمادي صور من raptor V2 دليل التعليمات. Step One — Fuel Tank Assembly خطوة واحدة -- الجمعية خزان وقود
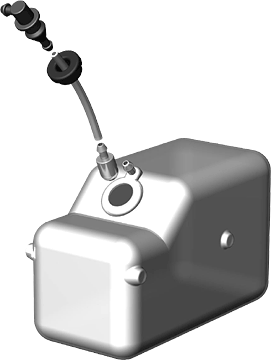 The instructions indicate that you must build the fuel tank but it comes already built. التعليمات التي يجب ان تشير الى ان بناء خزان وقود ولكن الامر تم بناء. Pull out the stopper and inspect the fuel line for damage. Rinse the tank and line and allow them to dry thoroughly before reassembling the tank. No, you may not take a break now. الانسحاب فان سداده وتفتيشها فى خط الوقود عن الضرر. التشطيف الدبابه والخط والسماح لها الجافه تماما قبل اعادة الدبابه. لأ ، انت ، ولا يجوز أن تتخذ كسر الآن. 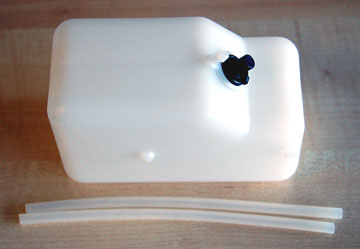 Do not connect any fuel tubing to the outside of the tank until the model is completely built and set up. There's no point in having the tubing in the way and abrading it against various assemblies in the heli while you're working on it. لا وقود اي ربط الانابيب الى خارج الدبابه حتى النموذج تماما وانشاء بنى. لا يوجد في وجهه بعد ان الانابيب في الطريق والضرب ضد مختلف الجمعيات في heli بينما أنت تعمل على ذلك. You might want to connect the two nipples with a short piece of tubing to keep crud out of the tank. قد ترغب في ربط اثنين من حلمات قصيرة مع قطعة من الخام وانابيب ان تبقى خارج الدبابه. Step Two — Clutch Bell Assembly الخطوة الثانية -- الجمعية التشبث الجرس
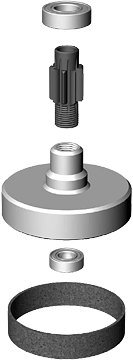 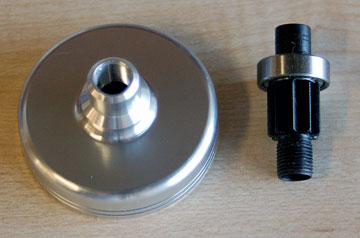 Parts for this assembly. قطع الغيار اللازمة لهذه الجمعية. 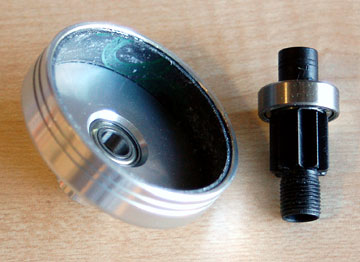 The clutch liner is already installed as is the lower bearing . All you need to do is thread the drive gear into the clutch bell . فإن التشبث بطانة تركيبها بالفعل كما هو ادنى واضعة كل ما عليك القيام به هو الخيط الدافع والعتاد الى التشبث الجرس. 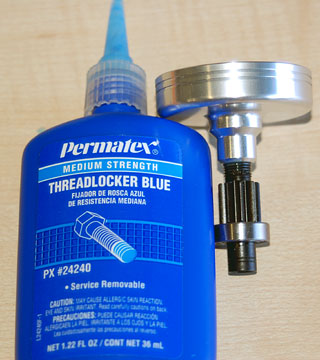 Clean the threads of both parts using alcohol. Apply Loctite before threading the parts together. خيوط تنظيف كل اجزاء باستخدام الكحول. التخييط قبل تطبيق loctite الاجزاء معا. Never apply Loctite to plastic parts. First, it doesn't work on plastic. Second, it may attack the plastic. Loctite تنطبق أبدا على اجزاء من البلاستيك. فهي ، اولا ، لا العمل على البلاستيك. الثانية ، قد ضرب من البلاستيك. Use Loctite only on metal-to-metal parts. Loctite فقط على استخدام المعادن الى اجزاء معدنيه. 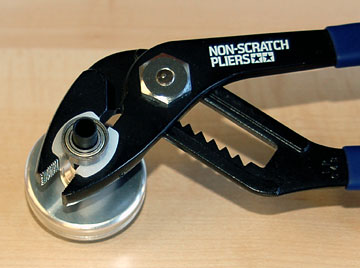 The instructions give no indication of what tool(s) you should use to tighten the gear to the bell. I suspect that if you hand tighten it then it will become tighter as the helicopter is run, but I could be wrong about that. التعليمات لا تعطي دليلا على ما اداه (ق) يجب ان تستخدم لتشديد والعتاد الى الجرس. واعتقد انه اذا كنت من جهة تشديد ومن ثم ستصبح اكثر صرامه كما هو تشغيل طائرات الهليكوبتر ، ولكنني يمكن أن يكون الخطأ في ذلك. I used nylon jaw pliers (Tamiya) to grasp the gear and tighten it. كنت نايلون الفك الزرديه (tamiya) من أجل فهم والعتاد وتشديد. 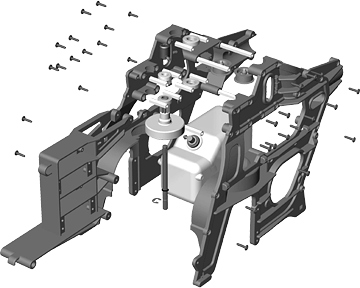 By the end of this step the frames will be joined having everything in between that must be added beforehand. وبحلول نهاية هذه الخطوة فإن الاطر وسينضم بعد كل ما فى وبين انه يجب ان تضاف مسبقا. 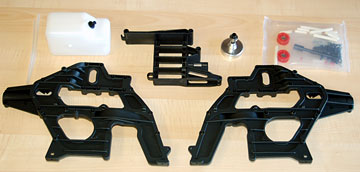 The parts needed for this step. Put the fuel line aside for now. We won't add it until the helicopter is built. الأجزاء اللازمة لهذه الخطوة. الوقود وضعت جانبا لخط الآن ، ولن نقبل ان اضيف انه حتى تقوم طائرات الهليكوبتر. 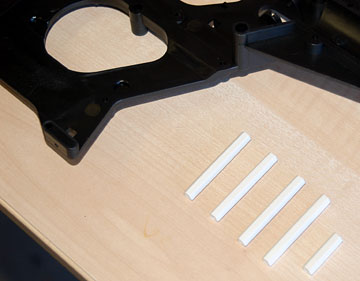 You'll notice that there are two lengths of frame posts . There are four long posts and eight short posts. انت سوف تلاحظ ان هناك اثنين من اطوال اطار وظيفة. وهناك أربع وظائف طويلة وقصيرة ثماني وظائف. 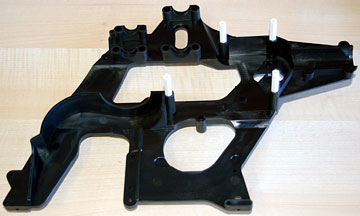 These are the locations of the long posts. وهذه هي المواقع طويلة من الوظائف. 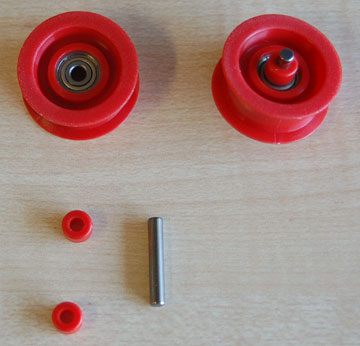 Assemble two guide pulleys . These pulleys push the tail rotor drive belt together so that it doesn't rub on the frame or tail boom. التجمع الثاني دليل البكرات. البكرات دفع هذه الذيل حملة الحزام الدوار معا حتى لا التدليك على الاطار او الذيل الازدهار. Place a collar on the pin , slide the pin through the pulley and then push a collar on the other end of the pin. مكان الياقه على رقم التعريف الشخصي ، فإن الشريحه من خلال رقم التعريف الشخصي البكره وبعد ذلك دفع أ الياقه على الطرف الآخر من رقم التعريف الشخصي. 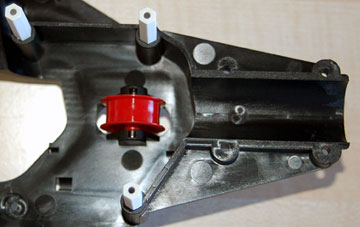 The pulleys are located just in front of the tail boom. Stops are molded in that will prevent the pin from coming out. البكرات موجودة فقط في الذيل امام الازدهار. قفات مصبوب في هذا الرقم من شأنه ان يمنع من الخروج. One pulley goes in each half of the frame. وغني عن بكرة واحدة في كل شوط من الاطار. 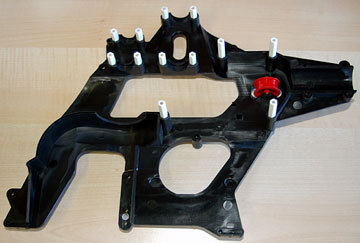 The pulley and all of the posts in place. You can screw the frame to the posts now or wait until the second frame half is in place. البكره وجميع الوظائف في مكان يمكنك برغي الاطار الى وظيفة الآن أو الانتظار حتى الثانية والنصف هو في الاطار. 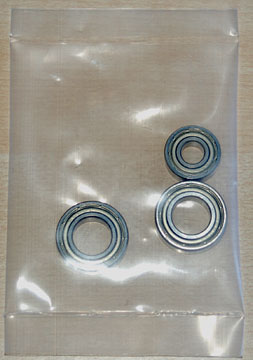 These three bearings must be in place before the frames are joined. هذه الاتجاهات الثلاثة لا بد ان تكون موجودة قبل الأطر وانضم. The two larger bearings are for the main shaft. The smaller bearing is for the starter shaft that engages the clutch. هما الاكبر حجما هي الاتجاهات الرئيسية للرمح. الاصغر حجما واضعه هو اشارة الانطلاق لشافت ان يشرك الفاصل. 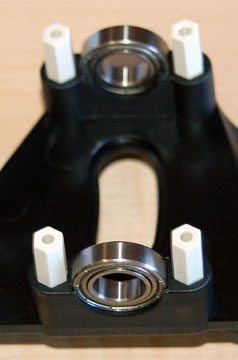 The main shaft bearings. رمح الاتجاهات الرئيسية.  The starter shaft . رمح الانطلاق. 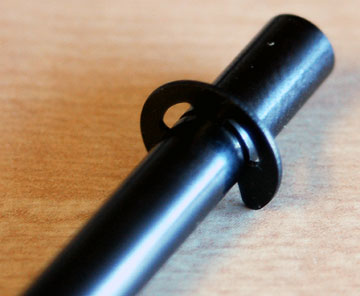 Place an E-clip in the groove cut into the starter shaft. ه - وضع علامة كليب في الأخدود قطع رمح الى الانطلاق. 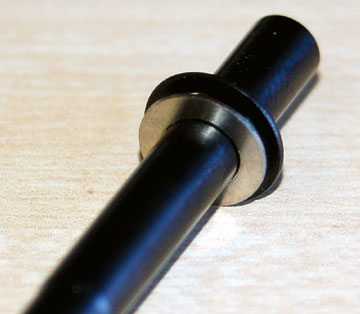 Slide the washer up to the E-clip. الشريحه الغساله إلى ه - كليب. 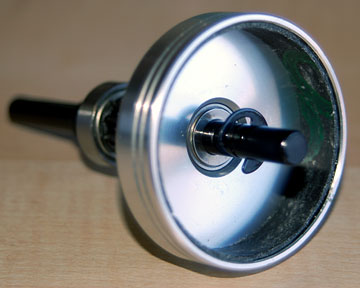 Slide the starter shaft into the clutch bell with the E-clip and washer inside the bell. رمح الشريحه الانطلاق الى التشبث الجرس مع التجارة الالكترونيه داخل الغساله كليب والجرس. 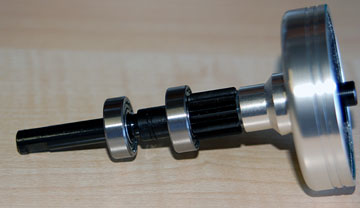 One bearing is already on the drive gear. Slide the second bearing on. وإذ تضع بالفعل واحد على حملة والعتاد. الشريحه الثانية اثر علي. 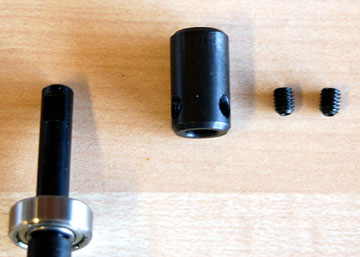 Clean the end of the starter shaft with alcohol. Also clean the set screws and starter coupling . النظيفه نهاية الانطلاق رمح مع الكحول. نظيفة ايضا مجموعة براغي واقتران المبتدئين. The starter coupling allows a 6 mm hex shaft to be used in your electric starter to start the engine. الانطلاق يسمح بالربط بين 6 مم الهيكس رمح لاستخدامها في بدء الكهرباءيه الخاصة بك لبدء المحرك. The starter shaft has two flats on the end for the set screws to engage. الانطلاق رمح اثنين من الشقق على وضع نهاية للبراغي للدخول. Put Loctite on each of the two set screws and insert the screws into the starter coupling just a couple of turns. Loctite على وضع كل واحد منهما على مجموعة براغي وبراغي تضاف الى الانطلاق اقتران بضع تتحول. 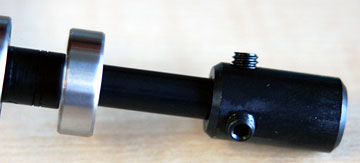 Slide the starter coupling onto the starter shaft and tighten the set screws lightly against the flats. الشريحه الانطلاق اقتران الانطلاق على رمح وتشديد مجموعة براغي باستخفاف ضد الشقق. After the frames are bolted together, loosen the set screws slightly. Push the starter shaft up against the inside of the bell. Push the starter coupling down until it touches the bearing. Securely tighten the set screws. بعد الاطر اندفع معا ، أن تخفف قليلا مجموعة البراغي. دفع الانطلاق رمح حتى ضد من داخل الجرس. اقتران دفع الانطلاق الى اسفل حتى انها تمس حمل. تشديد امن مجموعة البراغي. Oil the shaft using a light oil. رمح النفط فان استخدام النفط الخفيف. 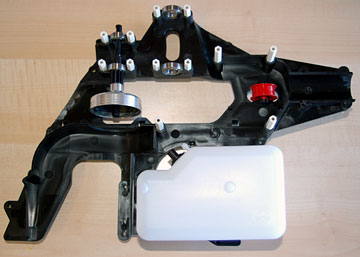 Place the clutch bell/starter shaft assembly in the frame. وضع الجرس التشبث / رمح الانطلاق في اطار الجمعية العامة. Add the fuel tank. The fuel tank has two molded protrusions that engage the frame. You'll see where they are when you get there. اضافة خزان وقود. خزان وقود اثنين مصبوب نتوءات ان اشراك الاطار. سترى فيها عندما نصل الى هناك. 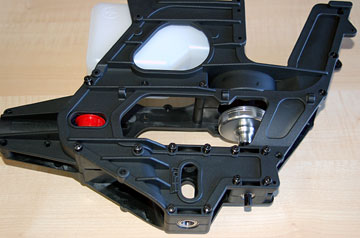 Align the second half of the frame and slide it onto the posts. Screw both frames to the posts. جعل النصف الثاني من هذا الاطار وانه على شريحة الوظائف. برغي كل من اطر لهذه الوظائف. Be gentle when tightening these screws. They will not come loose on their own. If you tighten them too much the plastic will strip. عندما يكون لطيف تشديد هذه البراغي. انها لن تأتي الا فضفاضة بنفسها. تشديد اذا كنت منهم الكثير من البلاستيك سترفع. 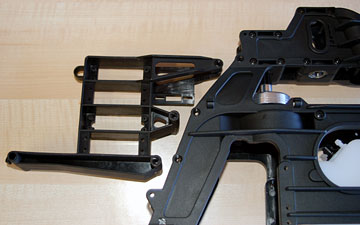 Insert the servo frame and screw it in place from both sides. تضاف الماكينه المساعدة في الاطار الزمني والبرغي في مكانه من كلا الجانبين. 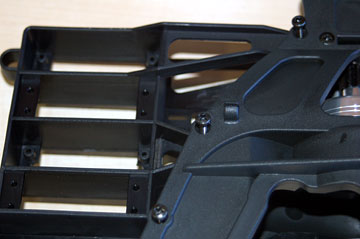 These are the three screw locations that hold the servo frame in place. وهذه هي المسمار المواقع الثلاثة التي تمسك الماكينه المساعدة في الاطار. 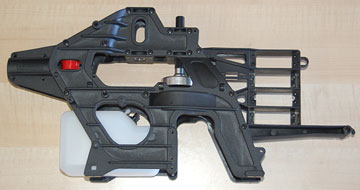 Part one of the frame assembly is complete. ؤ
|
|||
|
|
| مشاركة [ 2 ] | ||||
|
||||
|
|
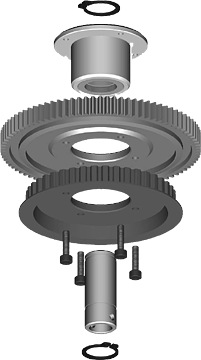 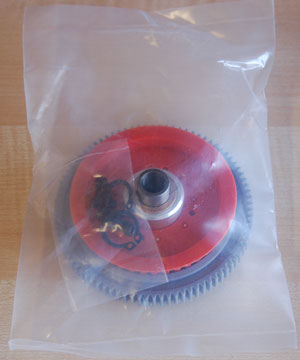 The parts bag for this assembly. أجزاء الحقيبه لهذه الجمعية. 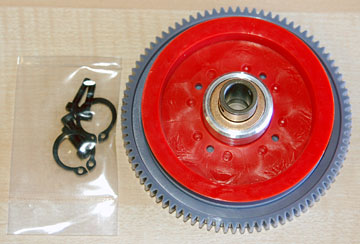 The one way clutch shaft comes inside the one way clutch housing . Remove it. طريقة واحدة رمح يأتي الفاصل داخل احدى الطرق التشبث الاسكان. ازالتها. 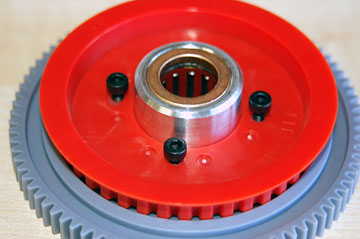 Place a drop of Loctite on each bolt and in the threads of the one way clutch housing. مكان وبنسبة انخفاض قدرها loctite الترباس وعلى كل الخيوط في واحد من الطريق الفاصل الاسكان. 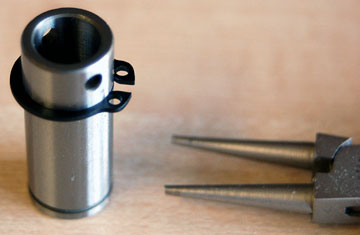 If you have a set of snap ring pliers this will be much easier. I don't have a set and used a set of round needle nose pliers to spread the ring. اذا كان لديك مجموعة من الخاطف الحلقه الزرديه وسيكون ذلك أسهل بكثير. انا ليس لدي مجموعة وتستخدم مجموعة من جولة ابرة الانف الزرديه لنشر الطوق. If this ring comes off then your heli is doomed. Be sure it is fully seated in the groove. واذا كان هذا الطوق ويأتي بعد ذلك من ماله الخاص بك heli. تأكد من انها كاملة يجلسوا في الأخدود. 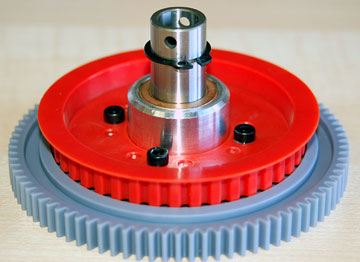 Insert the one way clutch shaft through the gears. Note which end is which. تضاف احدى الطرق من خلال التشبث رمح التروس. المذكره التي هي الغاية التي. 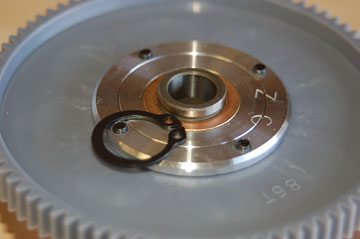 Another snap ring holds the shaft in place. آخر حلقة الخاطف يحمل رمح في المكان. 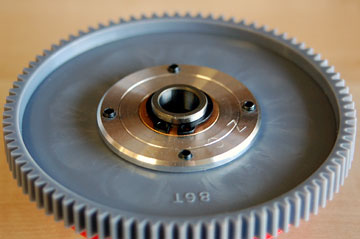 With the snap ring in place, the Main Drive Gear is completely assembled. مع الخاطف فى مكان الطوق ، والمهمات الرئيسية لمحرك الأقراص تماما تجميعها.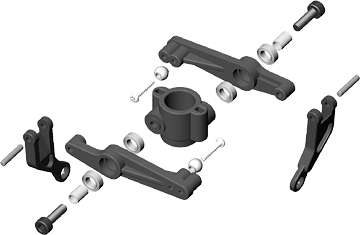 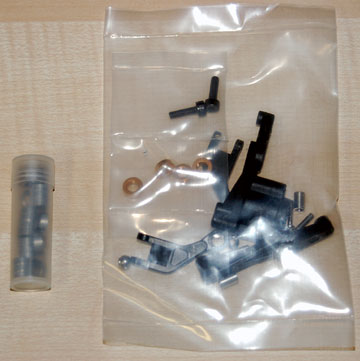 The parts bag needed for this assembly. حقيبة الأجزاء اللازمة لهذه الجمعية. I purchased the kit with 29 bearings and purchased the 20 bearing upgrade separately. I don't remember why I did that instead of buying the 49 bearing kit, but I think it was less expensive to do it this way. أنا أشتري 29 في اتجاهات عدة وقامت بشراء 20) ، وإذ تضع رفع مستوى على حدة. ولا اذكر ماذا فعلت ذلك ، بدلا من شراء مجموعة ال 49 واضعة ، ولكني اعتقد انه كان اقل تكلفة للقيام بهذه الطريقة. If you buy your kit the same way then you can put all the bronze bushings from the kit with your spare parts. You won't use any of them in this heli. اذا كنت شراء مجموعة الخاص بك بنفس الطريقة بعد ذلك يمكنك وضع جميع البرونزية البطانات مع مجموعة من قطع الغيار الخاصة بك ، انت لن تستخدم اي من هؤلاء في هذا heli. 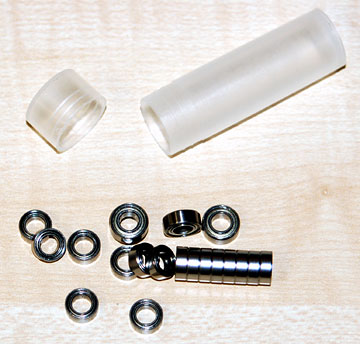 This is what you get for your $18.00. هذا هو ما تحصل عليه لهاتف $ 18،00. 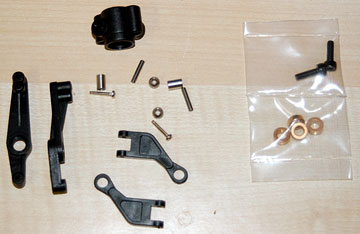 Parts for the washout assembly. 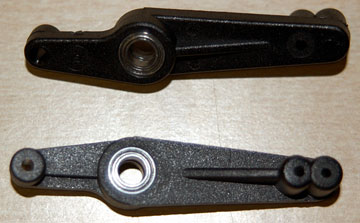 Press a bearing into each side of each flybar control lever . الصحافة تؤثر في كل جانب من السيطرة على كل flybar العتله. 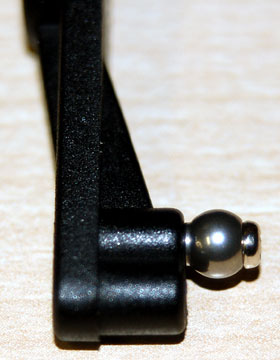 ة. ة. Use one of the M2 x 10 self-tapping screws to attach a ball to the inside hole. استخدام واحدة من متر مربع × 10 الذاتي والاستفادة من البراغي ان تعلق الكرة الى داخل الثقب. Note that the balls have a shoulder on one side. Throughout this build the shoulder will be on the opposite side of the screw head such that it spaces the ball slightly away from whatever it is bolted to. علما ان لديها كرات تحمل على جانب واحد. طوال هذه بناء الكتف سيكون على الجانب الآخر من رأس البرغي ان هذه المساحات الكرة قليلا بعيدا عن كل ما هو اندفع ل.  The flybar control linkages are attached the flybar control levers using a press-fit shaft. وقد flybar مراقبة الروابط تولى السيطرة flybar العتلات باستخدام الصحافة - صالح رمح. Note that the link side of the linkage is on the same side as the ball on the lever. علما ان وصلة الربط من الجانب هو على نفس الجانب الكرة على العتله. 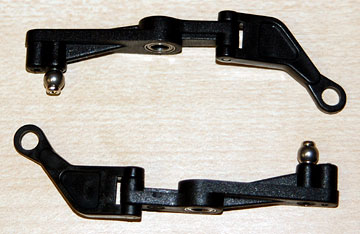 . 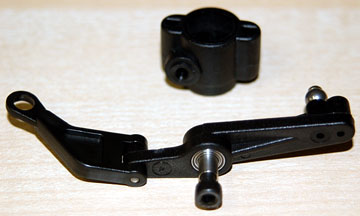 Place a collar inside the bearings of the lever assembly and bolt it to the washout base . وضع ياقه اتجاهات داخل الجمعية العامة للرافعه والترباس الى قاعدة الفشل. Be careful not to strip the plastic in the base. ان تحرص على عدم تجريد من البلاستيك في القاعده. 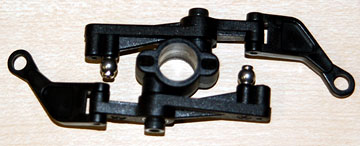
|
|||
|
|
| مشاركة [ 3 ] | ||||
|
||||
|
|
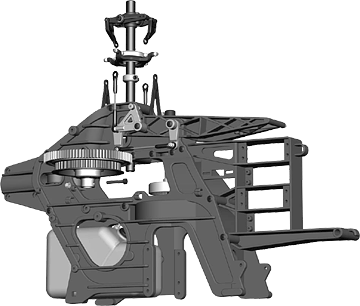 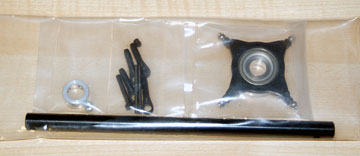 The parts bag for this assembly. أجزاء الحقيبه لهذه الجمعية. 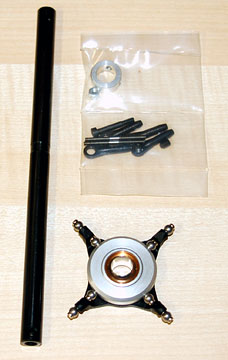 Parts for Step 3 of the Main Frame Assembly. الخطوة 3 لاجزاء من الاطار الرئيسي للجمعية العامة.  The Main Shaft . رمح الرئيسية. 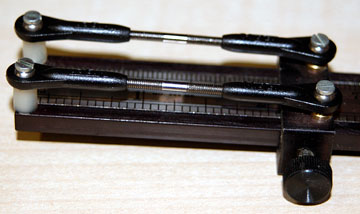 The aileron linkages should be 58 mm from center to center of the ball links. وقد المءخره الروابط ينبغي ان يكون 58 مم من مركز الى مركز للكرة وصلات. 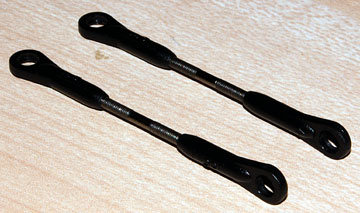 The completed aileron linkages. اكتمال المءخره الروابط. 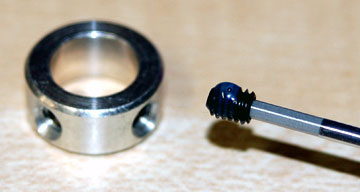 Use Loctite on the two set screws for the Main Shaft Lock Ring . استخدام loctite على اثنين من مجموعة براغي الرئيسية للرمح لوك الطوق. 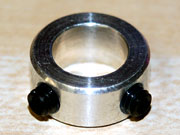 Thread the set screws in just a couple turns. الخيط مجموعة براغي في بضع تتحول. 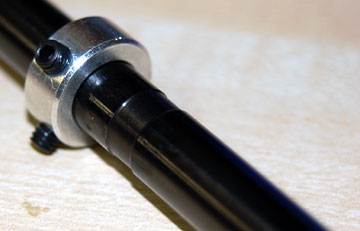 The lock ring slides down to groove cut into the main shaft. When the set screws are tightened the ring will not be able to slide because the groove in the shaft captures the set screws. القفل الى اسفل الطوق الشرائح الى قطع الاخدود الرئيسية رمح. عندما وضع البراغي هي تشديد الطوق لن تكون قادرة على الشريحه لأن الاخدود رمح في أسر مجموعة البراغي. When the collar is in the proper position, lightly snug the set screws. The collar will be repositioned later. عندما الياقه هو في الموقف الصحيح ، باستخفاف ركن الحانة مجموعة البراغي. الياقه وسيكون موضوع ثانية في وقت لاحق. 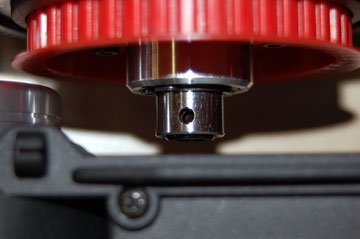 Insert the Main Drive Gear Assembly from Step 4 inside the frame. تضاف حملة المهمات الرئيسية للجمعية في الخطوة 4 من داخل الاطار. Slide the main shaft into the frame from the top through the two bearings inside the frame. رمح الشريحه الرئيسية في اطار من أعلى عن طريق اثنين من اتجاهات داخل الاطار. 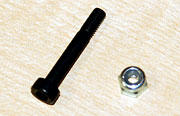 The socket bolt and lock nut that holds the main shaft to the helicopter. If you remove this bolt more than a couple times then replace the lock nut since it will be too loose to lock any more. المقبس الترباس وقفل جوزة ان يحمل رمح الرئيسي لطائرة الهليكوبتر. إذا كنت ازالة هذا الترباس اكثر من بضع مرات بعد ذلك يستعاض عن قفل جوزة نظرا لأنه سيكون فضفاضة جدا لقفل اي اكثر من ذلك. This bolt is the only thing keeping the main shaft from flying out of the heli, so obviously it's kind of important. الترباس هذا هو الشيء الوحيد الذي حفظ من الاعمده الرئيسية التي ترفع من heli ، وذلك من الواضح انه نوع من الاهميه. 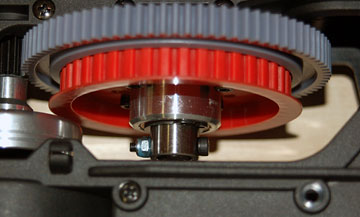 Line up the hole in the main gear assembly with the hole in the main shaft. حتى خط الثقب في المهمات الرئيسية للجمعية مع ثقب الرئيسية رمح. Insert the bolt and tighten the locknut. تضاف الترباس وتشديد ربطة. 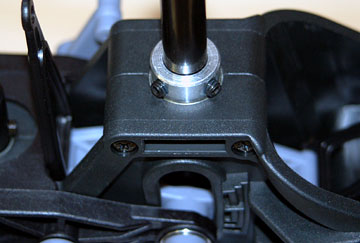 Loosen the set screws in the collar. Push the main shaft up and the collar down. Tighten the set screws securely. تخفيف مجموعة براغي في الياقه. دفع الرئيسية رمح والياقه حتى اسفل. تشديد مجموعة البراغي بشكل آمن. 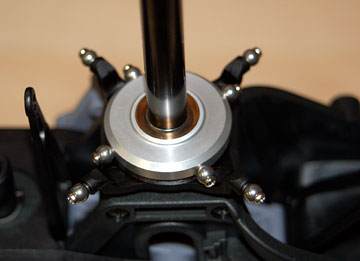 Slide the swashplate on the main shaft. حزا swashplate الرئيسية على رمح. 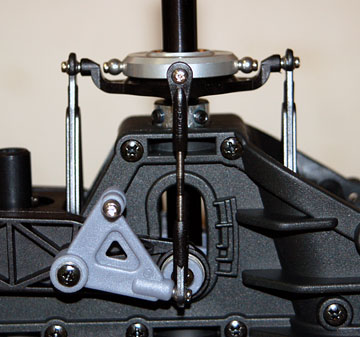 Connect the elevator and aileron links to the swashplate. وصل المصعد والمءخره وصلات إلى swashplate. 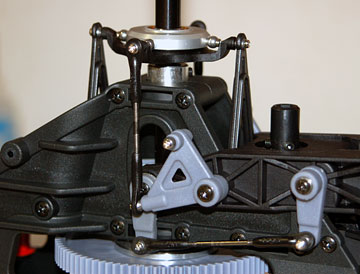 Another view of the linkages connected to the swashplate. رأي آخر للروابط صلة الى swashplate. 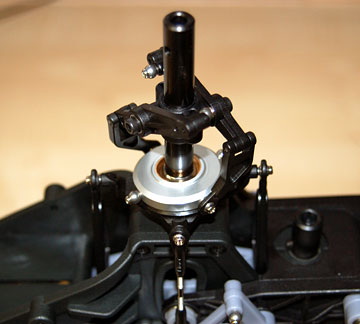 Slide the washout assembly from Step 5 onto the main shaft. حزا الفشل الجمعية من 5 الخطوة الرئيسية على رمح. 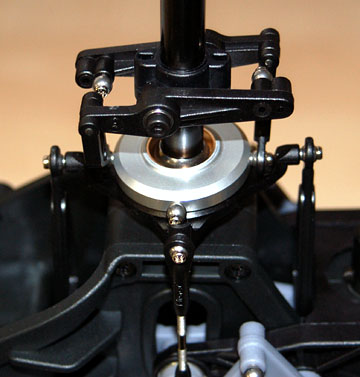
|
|||
|
|
| مشاركة [ 4 ] | ||||
|
||||
|
|
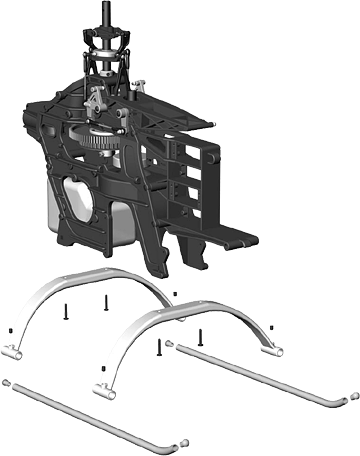 This is a simple step that I could probably skip, but in the interest of completeness I'll go ahead with it. وهذا هو مجرد خطوة على الارجح انني استطيع ان أعبر عن القفز ، ولكن في مصلحة اكتمال انا مع المضي قدما. 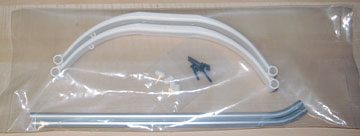 Parts bag for this assembly. أجزاء الحقيبه لهذه الجمعية. 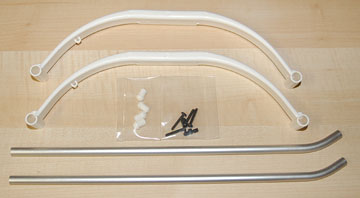 Parts for the landing skid assembly. قطع الغيار اللازمة لهبوط التزلج الجمعية. 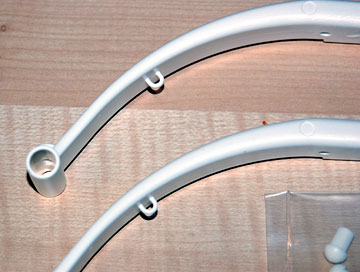 There is one hoop molded into the bottom of each brace . These are to hold the antenna wire tube and go on the right side of the heli as viewed from the cockpit. وهناك واحد الطوق مصبوب في اسفل كل الدعامه. وهذه هي لاجراء سلك الهوائي وتذهب انبوبيه على الجانب الايمن من heli كما تراه من كابينة القيادة. 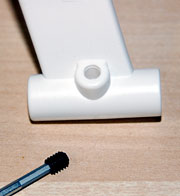 Insert the set screws a couple of turns. Do not use Loctite. تضاف مجموعة من البراغي وينتقل الزوجين. Loctite لا تستخدم. 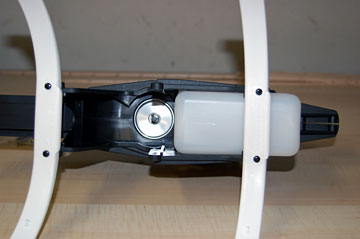 Bolt the braces to the bottom of the heli. The gear is angled forward. الترباس لتقويم الاسنان فإن الجزء السفلي من heli. الزاويه فان العتاد هو الى الامام. After these four screws are tightened, insert the skids (pipes). Rotate them until the forward curved portion is vertical. Adjust them fore to aft so they are in the same location (roughly centered around the braces) and then tighten the set screws. هذه البراغي بعد اربعة ضيقة ، تضاف التزلج (الانابيب). تناوب هؤلاء الى ان الامام هو الجزء المنحنى الراسي. نعدلها الى الصدارة في مؤخرة السفينة لتكون في نفس المكان (حوالى تمحورت حول تقويم الاسنان) وبعد ذلك تشديد مجموعة البراغي. I used medium CA to glue the skid pipe end caps in place. I popped them in with a piece of hardwood to get them in quickly before the glue set up leaving them half in and half out of the pipes. كنت المتوسطة كاليفورنيا الى الصمغ فإن قبعات التزلج في نهاية الانبوب. الاول منها في مفرقع مع قطعة من الخشب الصلب في لحثهم على وجه السرعه قبل انشاء الغراء وتركهم في نصف ونصف من الانابيب. |
|||
|
|
| مشاركة [ 5 ] | ||||
|
||||
|
|
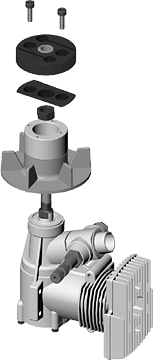 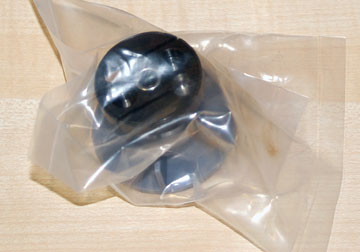 Parts bag for this assembly. أجزاء الحقيبه لهذه الجمعية. 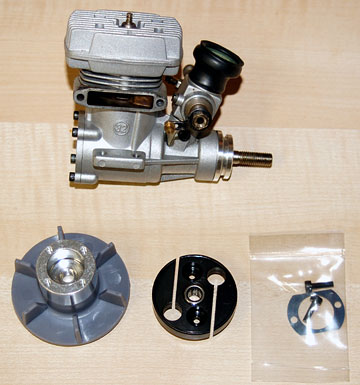 Parts needed for engine assembly. الأجزاء اللازمة لمحرك الجمعية. If your engine needs a throttle extension you should go ahead and add it to the engine now. اذا كان المحرك يحتاج الى خنق التمديد يجب ان تمضي قدما واضافتها الى محرك الآن. 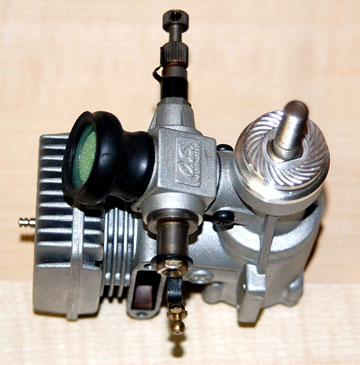 The OS .32 helicopter engine comes with a thrust washer which I think is a nice touch. The thrust washer allows you to mount the engine on a test stand and run it with a propeller. القانون الاساسي.32 محرك طائرة هليكوبتر تأتي مع التوجه الغساله التي اعتقد انها جميلة على اتصال. فحوي الغساله تسمح لك جبل المحرك عن طريق الاختبار والبعيد انه يقف مع المروحه. The benefit is that you can get the needles roughly set and ensure the engine works properly before mounting it in your heli. صالح هو ان يمكنك الحصول على مجموعة والابر تقريبا ضمان محرك يعمل على النحو الملائم قبل المتصاعده في heli الخاص بك. Many helicopter engines do not come with a thrust washer which means you have no choice but to adjust the engine in the helicopter from the beginning. كثير من محركات طائرات الهليكوبتر لا تأتي مع التوجه الغساله مما يعني لا يوجد لديك خيار اخر سوى تعديل في محرك الطائرة منذ البداية. 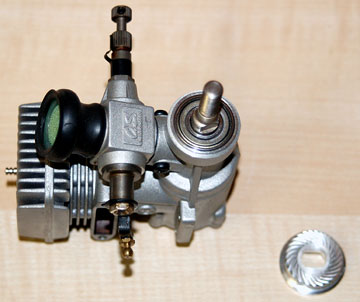 The thrust washer must be removed. Put it someplace where you can find it if you ever need it again (which I did). The box the engine came in is a good place. فحوي الغساله ويجب ان تلغى. وضعها في مكان ما حيث يمكنك ان تجد واذا كنت من اي وقت مضى في أمس الحاجة اليها مرة اخرى (التي فعلت). المربع جاء فى المحرك هو مكان جيد. 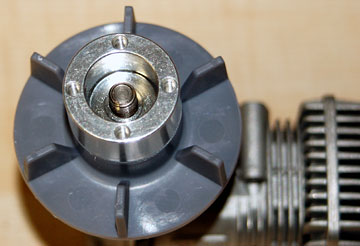 Clean the crankshaft threads and the cooling fan threads with alcohol. تنظيف ناقل الحركة والخيوط وخيوط مروحه التبريد مع الكحول. Apply Loctite only to the fan threads and thread the fan onto the crankshaft. The reason you apply Loctite to the fan threads only is so that the Loctite goes into the fan and not into the engine front bearing. Loctite تنطبق الا على مروحه والخيوط والخيط فان مروحه اتجه الى ناقل الحركة. السبب قمت بتطبيق loctite الى خيوط الا فان ذلك loctite ان يذهب الى مروحه وليس الى الجبهة ، وإذ تضع المحرك. There is a tool you can buy that threads into the glow plug hole on the engine and prevents the engine from turning over so you can tighten the fan. I don't like the idea of that much as I don't think the engine is designed for that kind of load. I remove the carburetor, place the largest dowel that will fit inside and tighten the fan with a rag wrapped around it. وهناك اداة يمكنك ان تشتري الخيوط الى وهج لسد ثقب على المحرك والمحرك يمنع من تسليم حتى تتمكن من تشديد مروحه. لا احب فكرة ان ما لا اعتقد ان محرك تصمم لهذا النوع من الحمل الأول ازالة المازج ، اكبر مكان المسمار التي تناسب داخل وتشديد مروحه مع خرقه ملفوفه حولها. 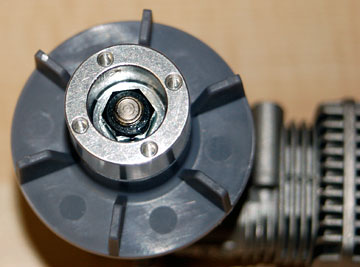 Apply Loctite to the crankshaft threads and the propeller nut. Tighten the nut securely using a socket wrench. تنطبق loctite الى ناقل الحركة والخيوط والمروحه البندق. تشديد امن البندق باستخدام المقبس مصدر الحزن. 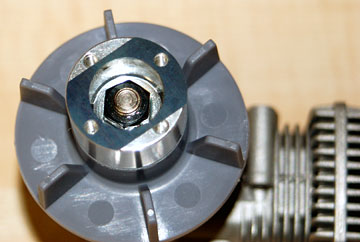 Add the shim to the cooling fan. Align the holes in the shim with the holes in the cooling fan. تضاف الحشوه الى مروحه التبريد. محاذاه ثقوب في الحشوه مع ثقوب في مروحه التبريد. 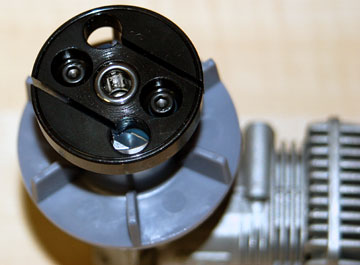 Place the clutch shoe on the cooling fan. Align the holes in the clutch shoe with the holes in the shim and cooling fan. وضع الاحذيه على التشبث مروحه التبريد. محاذاه ثقوب في التشبث الاحذيه مع ثقوب في الحشوه ومروحه التبريد. Apply Loctite to the socket head bolts and tighten the clutch securely. تنطبق loctite الى المقبس رئيس مسامير وتشديد التشبث بشكل آمن. |
|||
|
|
| مشاركة [ 6 ] | ||||
|
||||
|
|
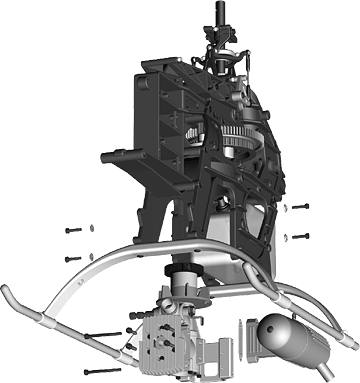 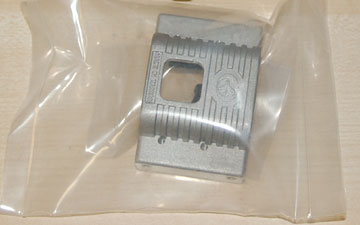 Parts bag for this assembly. أجزاء الحقيبه لهذه الجمعية. 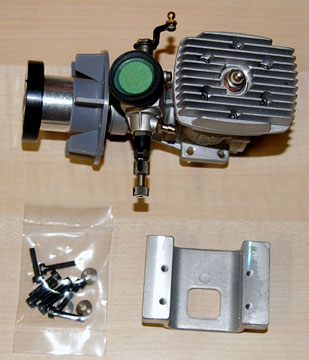 Parts needed for part 4 of the main frame assembly. الأجزاء اللازمة للالجزء 4 من الاطار الرئيسي للجمعية العامة. 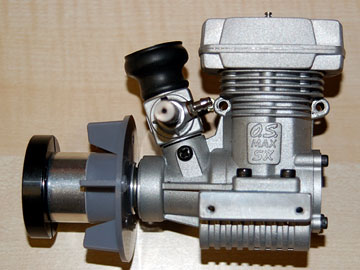 Use the four socket bolts to secure the engine to the engine mount . Use Loctite on all the bolts. استخدام المقبس أربعة مسامير لضمان محرك الى محرك جبل. Loctite على استخدام جميع مسامير. Note that the engine goes toward the back of the mount. علما بأن محرك يذهب في اتجاه الجزء الخلفي من جبل. 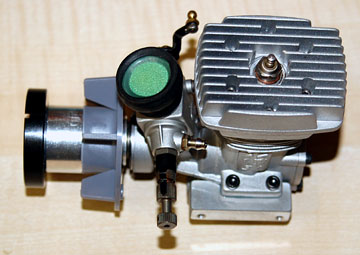 Another view of the engine mounting. رأي آخر للمحرك المتصاعده. 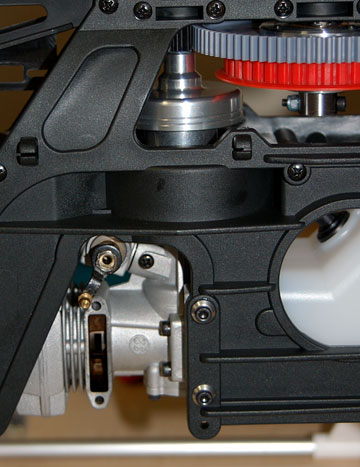 Insert the engine through the bottom of the frame. It should slide into place easily. تضاف عن طريق محرك الجزء السفلي من الاطار. وينبغي ان الانزلاق الى مكان بسهولة. Slide the tapered flat washers onto the socket bolts, apply Loctite and tighten the engine to the frame. حزا مستدق شقة الغسالات على المقبس مسامير ، وتشديد تطبيق loctite المحرك الى الاطار. 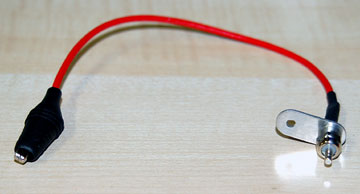 A glow plug extension isn't absolutely necessary, but getting to the glow plug is awkward without one. أ يتوهج لسد التمديد ليست ضروريه تماما ، لكن الوصول الى وهج سد العجز هو واحد من دون محرج. 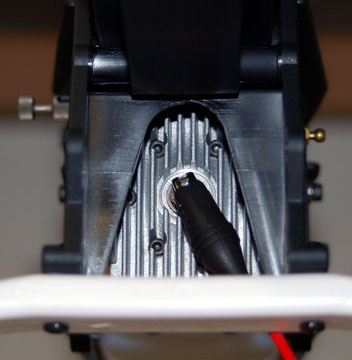 Attach the extension to the glow plug. نعلق التمديد الى سد العجز يتوهج. 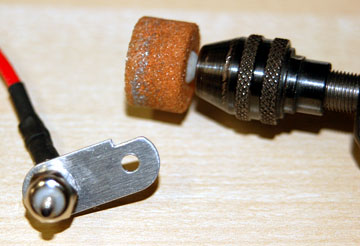 Most extensions are single wire which means the other end has to be grounded to the engine which limits your mounting options. معظم تمديدات الاسلاك واحدة ، وهو ما يعني في المقابل ان يكون على أسس لمحرك مما يحد من الخيارات الخاصة بك المتصاعده. Mine had to be reworked slightly so that I could mount it. الالغام كان لا بد من اعادة صياغه قليلا كي اتمكن من جبل. 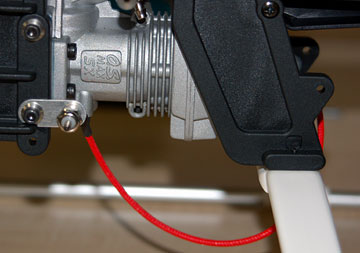 The extension is mounted using one of the engine mount bolts so that the extension is grounded to the engine. تمديد اقامته هو استخدام محرك واحد من جبل مسامير ذلك ان التمديد هو المحرك الأساس ل. This step also shows the engine muffler being mounted but that's premature. The throttle linkage will be attached in a later step and the muffler will be in the way when that time comes. وتبين هذه الخطوة ايضا محرك الخمار الذي يعقد حاليا ولكن هذا سابق لأوانه. خنق فإن الربط سوف تعلق في خطوة لاحقة والخمار وسيتم في طريقة وعندما يحين الوقت. |
|||
|
|
| مشاركة [ 7 ] | ||||
|
||||
|
|
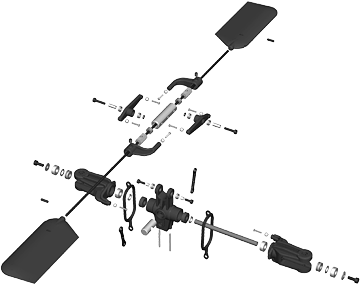 This is probably the most complex step in building the Raptor. It's not difficult but can be confusing in certain areas. I've taken additional photos to help clarify what needs to be done. لعل ذلك هو الخطوة الاكثر تعقيدا في بناء raptor. انها ليست صعبة ولكنها يمكن ان تكون مربكه في بعض المناطق. لقد اتخذت صور اضافية للمساعدة في توضيح ما ينبغي القيام به.  The parts bag for this assembly... أجزاء الحقيبه لهذه الجمعية... 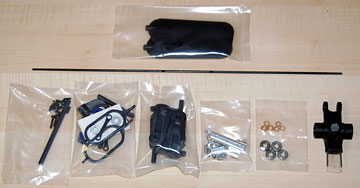 which breaks down into several more parts bags. الذي ينهار الى اكثر من أجزاء عدة اكياس. 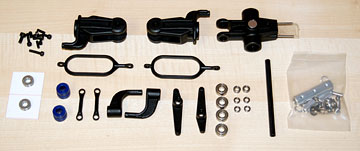 Parts for the main rotor head assembly. الاجزاء الرئيسية الدوار لرئيس الجمعية العامة. 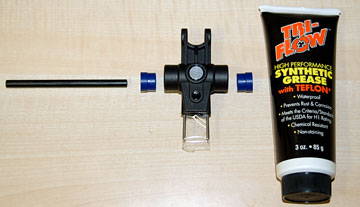 Grease the outside and inside of the rubber flap dampers using a non-petroleum grease. الشحوم من الخارج والداخل من المطاط دحرج الموهنات باستخدام غير البتروليه الشحوم. 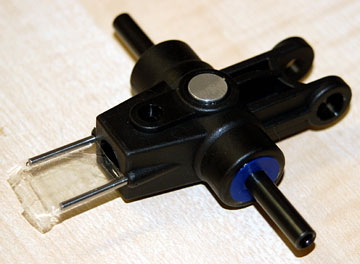 Insert the flap dampers into the main rotor hub . Slide the feathering shaft through the flap dampers. Get it more or less centered. تضاف الى دحرج الموهنات الرئيسية المحور الدوار. حزا الترييش رمح من خلال دحرج الموهنات. يحصل عليها تتمحور اكثر او اقل. 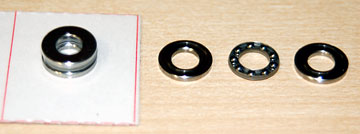 The thrust bearings are shrink wrapped because they are actually three pieces each. اتجاهات هي فحوي لف يتقلص بسبب انها في الحقيقة كل ثلاث قطع. The two outside bearing races are not the same size but you can't tell just by looking. Pay attention to what you're doing here because this is the one place where it's easy to go wrong. وإذ تضع هاتين خارج الأجناس ليست هي نفس الحجم ولكن لا يمكنك ان تتحقق من خلال النظر فقط. ايلاء الاهتمام الى ما كنت تفعل هنا لان هذا هو مكان واحد حيث يكون من السهل على خطأ. 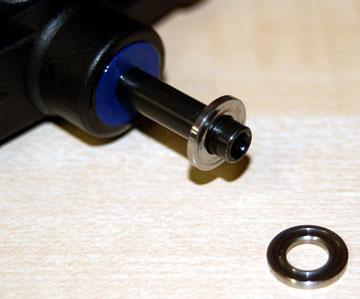 Slide each race on the feathering shaft. Wiggle it to find which one has a larger hole. One of the races will wiggle much more than the other. الشريحه كل سباق على الترييش رمح. تلو هو ان يجد المرء اكبر ثقب. واحد من الاعراق تلو اكثر بكثير من غيرها. The race with the larger hole goes to the inside. The race with the smaller hole goes toward the blade. السباق مع أكبر ثقب يذهب الى الداخل. السباق مع اصغر ثقب يذهب في اتجاه الشفره. 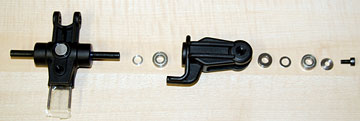 The main rotor pitch housing and associated parts. الرئيسية الدوار رمية الاسكان وما يرتبط بها من أجزاء. 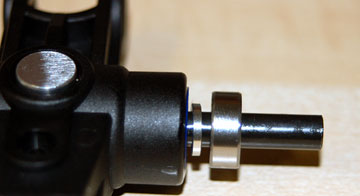 Slide the aluminum flap collar onto the feathering shaft. الشريحه الالومنيوم دحرج ياقه اتجه الى الترييش رمح. Slide on the bearing , flybar control rods and then the main rotor pitch housing. وإذ تضع على الشريحه ، flybar وقضبان التحكم الرئيسية الدوار ثم رميه في السكن. 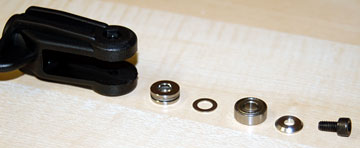 These are the parts that go inside the main rotor pitch housing shown in the order they are inserted. هذه هي الاجزاء التي تذهب داخل الملعب الرئيسي الدوار السكن المبينه في النظام وهي تندس. The first part to go in is the thrust bearing . Again, make sure the larger hole is in and the smaller hole is out. الجزء الاول هو الذهاب في اتجاه واضعه. مرة اخرى ، للتأكد من الثقب الاكبر والاصغر في الثقب. After the bearing is inserted, slide on the thin flat washer followed by the bearing and then the tapered flat washer . Put a small amount of Loctite only in the feathering shaft. Thread the bolt into the end of the feathering shaft to hold it all in place. بعد ان حمل هو عبارة ، على شريحة رقيقة شقة الغساله التي تتبعها وحمل ومستدق ثم شقة الغساله. وضع كمية صغيرة من loctite الا في الترييش رمح. الترباس الخيط الى نهاية للالترييش رمح لاجراء كل ذلك في مكان. 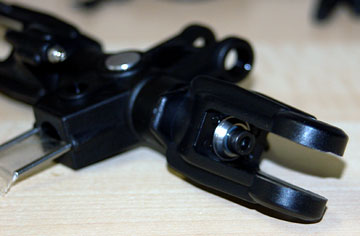 Place a hex wrench in each of the main rotor pitch housing bolts and tighten them securely. وضع الهيكس مصدر الحزن في كل من رمية الاسكان الدوار الرئيسي للمسامير وتشديد بصورة آمنة. I didn't put the flybar control rods on and had to remove the main rotor pitch housings so they could be added. لم أكن وضع flybar السيطرة على قضبان وكان لإزالة الدوار رمية المقرات الرئيسية بحيث انها يمكن ان تكون. 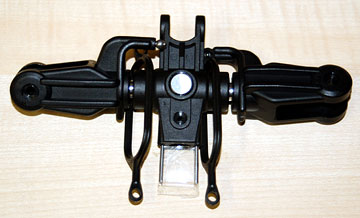 The main rotor pitch housings assembled to the main rotor hub. الرئيسية الدوار رمية المقرات الرئيسية لتجميع المحور الدوار. 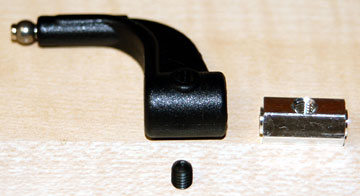 Parts for the flybar control arm . Flybar قطع الغيار اللازمة لمراقبة التسلح. 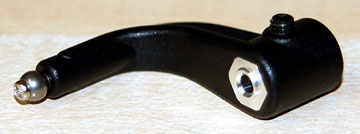 Slide the flybar arm bushing into the flybar control arm. Thread the set screw in a few turns. حزا flybar البطانه الذراع الى الذراع flybar مراقبة. الخيط برغي في مجموعة قليلة وينتقل. 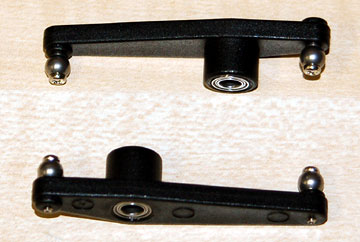 Insert a bearing into each side of each mixing lever . وإذ تضع يضاف الى كل جانب من كل خلط العتله. Thread two balls onto each lever. الخيط اثنين من كل الكرات على العتله. 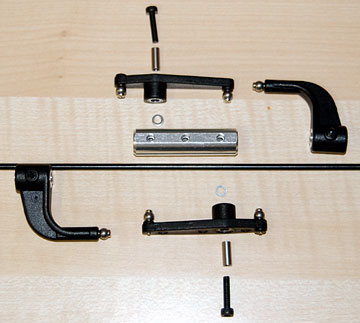 Parts to assemble to the flybar seesaw hub . لتجميع اجزاء flybar الى محور الارجوحه. Note the washers between the mixing levers and the seesaw hub. ملاحظه الخلط بين غسالات والعتلات محور الارجوحه. 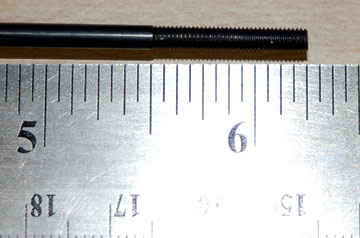 Carefully center the flybar rod in the flybar seesaw hub. مركز بعناية flybar رود في محور flybar الارجوحه. 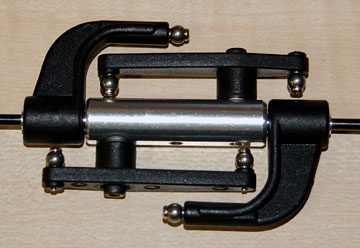 There is flat on each side of the flybar rod for the set screws in the flybar control arms to tighten against. Ensure they are lined up correctly before tightening them. وهناك شقة على كل جانب من flybar رود لوضع البراغي في flybar لتشديد الرقابة على الاسلحة. كفاله ان يتم بشكل صحيح قبل ان اصطف تضييق عليها. Check that the flybar rod is still centered. التحقق من ان flybar لا تزال تتمحور حول القضيب. Add Loctite to the bolts for the mixing levers and bolt the mixing levers to the seesaw hub. Loctite اضافة الى مسامير لخلط العتلات والترباس الخلط العتلات الى محور الارجوحه. 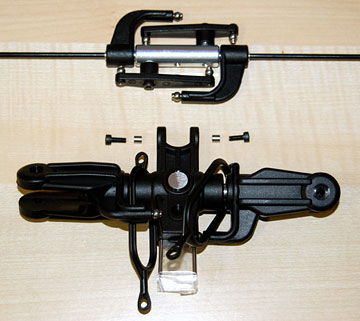 The seesaw hub assembly and main rotor hub assembly. الارجوحه فان المحور الرئيسي للجمعية ومحور دوار الجمعية. 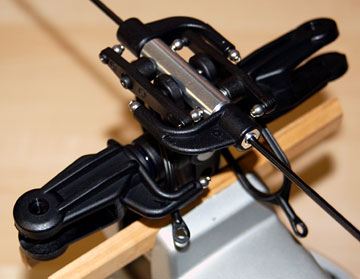 Add Loctite to the two bolts holding the seesaw hub to the main rotor hub and bolt these assemblies together. Loctite اضافة الى اثنين من مسامير عقد الارجوحه المحور الرئيسي الى محور دوار والترباس هذه الجمعيات معا. 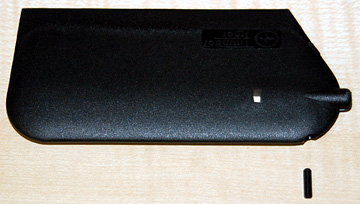 A set screw threads into the front of each flybar paddle. برغي مجموعة خيوط في كل جبهة من flybar مجذاف. 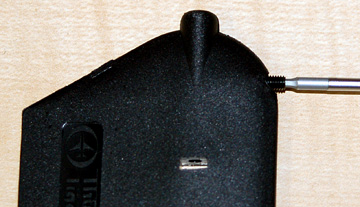 Thread the set screw in several turns. برغي مجموعة الخيط في عدة تتحول. 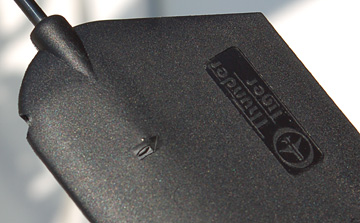 Thread the paddles onto the flybar rod until the end of the flybar rod appears in the window cut-out in the paddle. الخيط فان المجاذيف اتجه الى flybar حتى نهاية قضيب من قضبان flybar يبدو في وقف نافذة في مجذاف. Measure the distance from the seesaw hub to each paddle to ensure they are exactly the same distance قياس المسافة من محور الى الارجوحه كل مجذاف للتأكد من انها هي بالضبط المسافة نفسها The paddles are very difficult to adjust with any degree of accuracy due to the very tight fitting threads. المجاذيف فإن من الصعب جدا على التكيف مع اي درجة من الدقه نظرا لضيق جدا خيوط المناسب. I suggest you thread the paddles on as far as they go and then thread them back completely off at least three times to loosen them up a little. واقترح لكم الخيط فان على المجاذيف ، بقدر ما اذهب والخيط ثم يعيد اليهم تماما من ثلاث مرات على الاقل لتخفف عنها قليلا. When you thread them on the last time apply a little sewing machine oil or grease to the threads. عندما كنت لهم على خيط آخر مرة تطبيق قليلا ماكينات الخياطه النفط او الشحوم الى خيوط. The rotor head turns clockwise. Ensure the paddles face the correct direction. الدوار رئيس تتحول في اتجاه عقارب الساعة. المجاذيف ضمان مواجهة الاتجاه الصحيح. 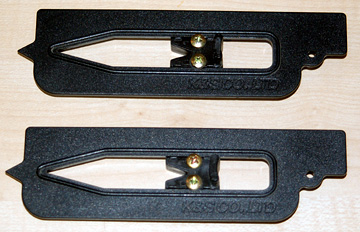 A pair of paddle pitch gauges used to ensure the paddles are absolutely level with each other. These do not come with the kit. زوج من المجذاف رمية المقاييس المستخدمة لضمان مستوى المجاذيف على الاطلاق مع بعضها البعض. وهذه لا تأتي مع هذه المجموعة. 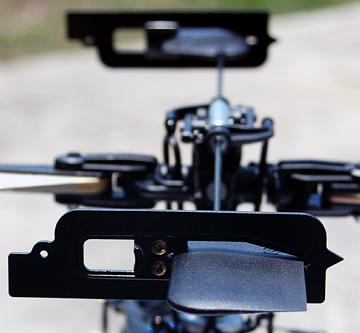 The paddles should be level with each other and with the swashplate when the swashplate is level. وقد المجاذيف ينبغي ان يكون المستوى فيما بينها ، وكذلك مع swashplate عندما swashplate هو المستوى. This is why you need to loosen the threads. If you don't, then when you try to make minute adjustments to the pitch of either paddle, the flybar rod will twist instead of the paddle turning. It suddenly lets loose and the paddle ends up at some angle other than what you want. وهذا هو السبب في ان تخفف انت بحاجة الى خيوط. إذا كنت لا ، ثم عند محاولة لجعل الدقيقة ادخال تعديلات على درجة من اي من المجذاف ، flybar رود سوف تويست بدلا من تحول مجذاف. فجاه انه يتيح فضفاضة وينتهي مجذاف حتى في بعض زاويه اخرى غير ما تريد. 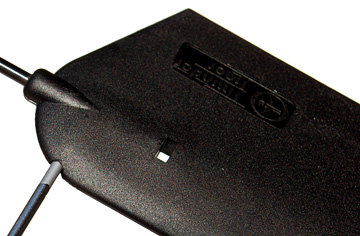 When you are satisfied with the set up, tighten the set screws in the paddles. Don't over-tighten them. عندما أنت راض عن انشاء ، وتشديد الرقابة مجموعة براغي في المجاذيف. لا اكثر - تشديد لهم.
|
|||
|
|
| مشاركة [ 8 ] | ||||
|
||||
|
|
 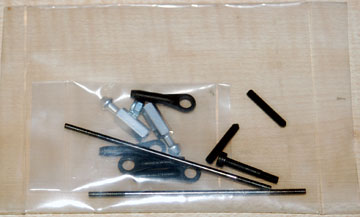 Parts bag for this assembly. أجزاء الحقيبه لهذه الجمعية.  Canopy retaining post and set screw . مظله والإبقاء على وظيفة مجموعة المسمار. 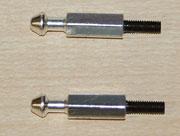 Apply Loctite inside the canopy retaining post and thread in the set screw. تنطبق loctite داخل مظله والإبقاء على وظيفة في مجموعة الخيط المسمار. 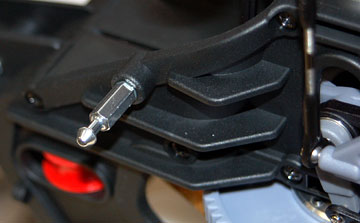 Thread the assembly into the main frame just behind and above the main gears. الخيط الجمعية الى الاطار الرئيسي وراء مجرد اعلاه الرئيسية التروس. 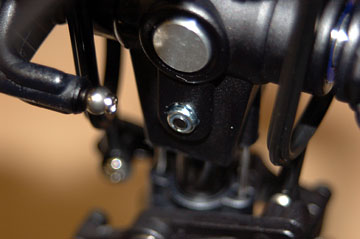 Slide the main rotor hub on the main shaft. Be sure to align the pins in the main rotor hub with the washout base in the washout assembly. الشريحه الرئيسية على محور دوار الرئيسية رمح. التأكد من مواءمه دبابيس الرئيسي في محور دوار مع قاعدة الفشل الفشل في الجمعية العامة. Bolt the hub to the main shaft using the socket bolt and lock nut . الترباس المحور الرئيسي لرمح باستخدام المقبس قفل الترباس والبندق.  Make two 100 mm pushrods. ابدى ملاحظتين 100 ملم pushrods. 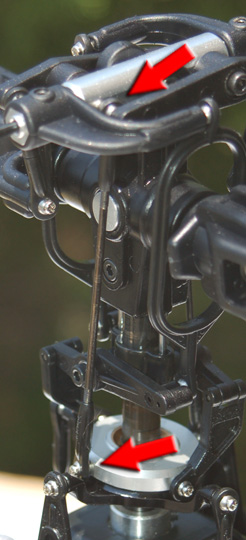
|
|||
|
|
| مشاركة [ 9 ] | ||||
|
||||
|
|
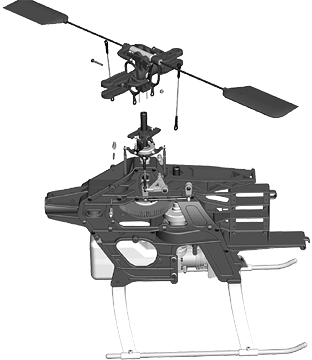
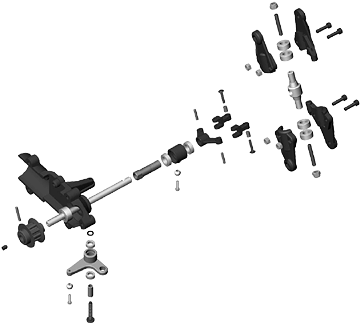 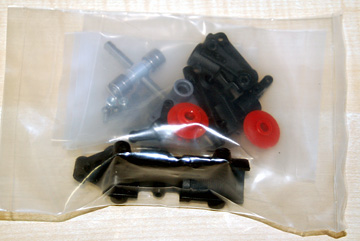 The parts bag for this assembly. أجزاء الحقيبه لهذه الجمعية. 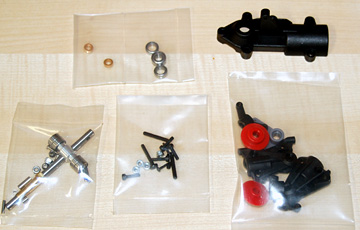 Parts for the tail unit assembly. اجزاء من الذيل وحده للجمعية العامة. 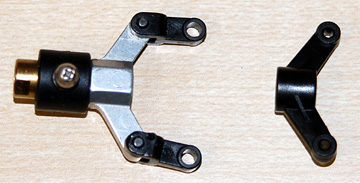 I broke several tail pitch control forks on my original Raptor when I was first learning to hover and dragged the tail across the ground. I finally bought the metal fork which is much stronger and survived the crash. كسرت عدة تتفرع الذيل درجة السيطرة على بلدي الاصلي raptor عندما كنت أول التعلم الى تحوم وننجر وراء الذيل في جميع انحاء الأرض. وأخيرا اشترى لي ان المعدن الذي هو شوكة اقوى بكثير ونجا من حادث تحطم الطائرة. I will use the metal fork because I have it. فسوف اسعى الى شوكة معدنيه لأني أريد ذلك. 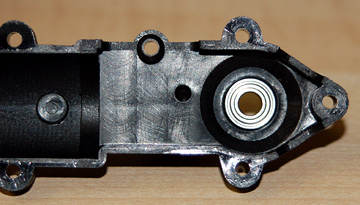 Insert the bearing into the right tail unit housing . وإذ تضع تضاف الى الذيل وحده الحق في السكن. 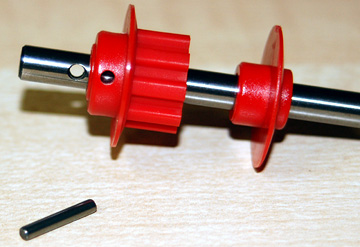 Slide the tail pulley and tail pulley flange onto the tail rotor shaft . The flange goes toward the right housing. الشريحه الذيل والذيل بكرة بكرة على الحافه الذيل الدوار رمح. يذهب في اتجاه الحافه فإن الحق في السكن. My thanks to Emiel Koning for pointing out that I put the tail pulley flange on backward. If you look at the next image you can see there is a slight taper on one side of the flange. The taper should be against the gear with the flat side out. شكري لemiel koning لافتا الى ان اضع بكرة الذيل على الحافه الى الوراء. واذا نظرتم الى الصورة التالية يمكنك ان ترى ان هناك الاستدقاق طفيف على جانب واحد من الحافه. الاستدقاق فان ينبغي ان تكون ضد والعتاد مع الشقه الجانب. I have to disassemble this unit to correct it so I'll take new photos at that time. أجد لزاما علي ان تفكيك هذه الوحدة لتصحيح ذلك انا صور جديدة تأخذ في ذلك الوقت. 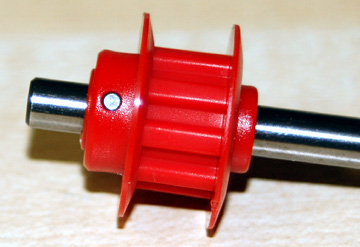 Press the pulley and flange together and line the pulley up with the hole in the shaft. Insert the pin . البكره والصحافة الى جانب الحافه وحتى خط البكره مع الثقب في رمح. تضاف رقم التعريف الشخصي. Again, the flange is backward and should not be installed as shown. ومرة اخرى ، فان الحافه متخلفه وينبغي ان لا يتم تثبيت كما هو مبين. 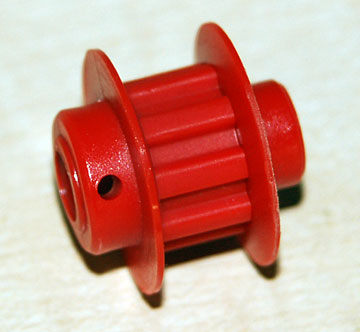 This is how the tail pulley and tail pulley flange should be assembled. وهذه هي الطريقة التي ذيل الذيل وبكرة بكرة الحافه ينبغي ان يتم تجميعها. If you look at the flange you will notice that there is a long shank and a short shank. اذا كنت القاء نظرة على الحافه ، ستلاحظ ان هناك طويل وقصير الساق الساق. The short shank goes into the tail pulley. القصير الساق يذهب الى الذيل بكرة. 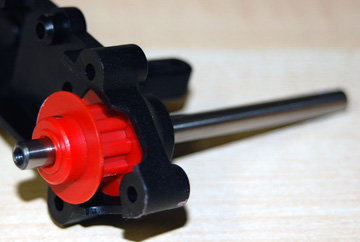 Slide this assembly into the bearing in the right housing. الانزلاق الى هذه الجمعية ، وإذ تضع في الحق في السكن. 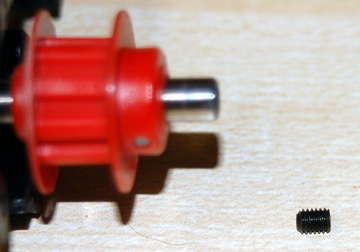 This set screw prevents the pin from coming out. وهذا ما اشعل المسمار يمنع رقم التعريف الشخصي من الخروج. 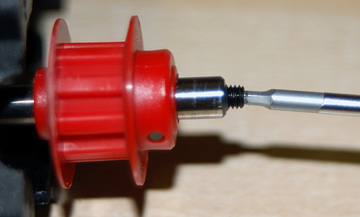 Apply Loctite in the tail rotor shaft, insert the set screw and tighten it against the pin. تنطبق loctite في ذيل دوار رمح ، تضاف مجموعة المسمار وتشديد ضد رقم التعريف الشخصي. 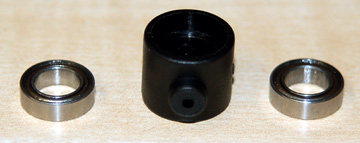 Insert two bearings into the tail pitch control slider . اتجاهات اثنين تضاف الى درجة السيطرة على شريط التمرير الذيل. 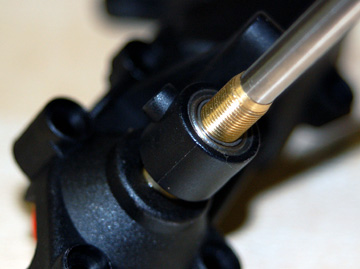 Slide the tail pitch control slider bushing onto the tail rotor shaft. Slide the tail pitch control slider onto the bearing. الشريحه الذيل درجة السيطرة على شريط التمرير البطانه الذيل الدوار رمح. شريحة الذيل درجة السيطرة على حمل شريط التمرير. 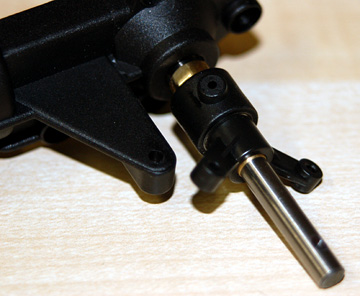 Thread the tail pitch control fork onto the tail pitch control slider bushing. The bushing has two flats so it can be gripped with an open end wrench. خيط الذيل درجة السيطرة على مفترق الذيل درجة السيطرة على شريط التمرير البطانه. البطانه فان اثنين من الشقق وبالتالي يمكن أن يجتاح مفتوح مع نهاية مصدر الحزن. If you have the metal fork be sure to use Loctite when you thread it onto the bushing. اذا كان لديك المعدن مفترق التأكد من استخدام loctite لكم الخيط انه عندما اتجه الى البطانه. 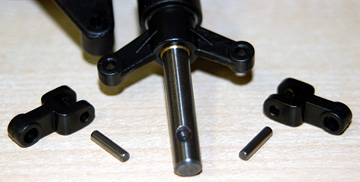 Tail pitch control links and pins . الذيل درجة السيطرة على وصلات والدبابيس. 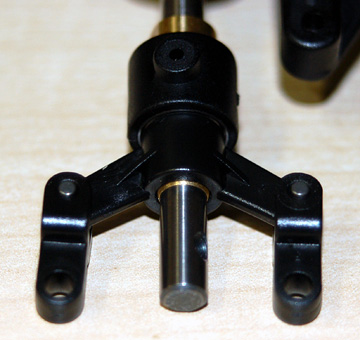 Place the tail pitch control links over the fork and insert the pins. The pins are a press fit. If you can not insert them by hand, use the plastic handle of a screwdriver or hardwood block to press them in place. Don't beat on them. They aren't that difficult to push into place. مكان الذيل درجة السيطرة على وصلات اكثر من مفترق الطرق وتضاف دبابيس. الدبابيس هي صحافي مناسبا. إذا كنت لا يمكن ان تضاف اليها من جهة البلاستيك معالجة استخدام المفك من الخشب الصلب او تكتل لمكان لهم في الصحافة. لا فاز عليهم وهم ليسوا من الصعب أن تدفع الى مكان. 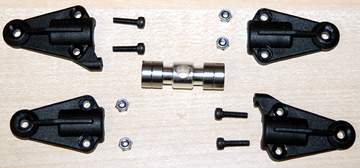 Tail rotor hub , tail pitch housings , bearings and hardware . المحور الدوار الذيل ، الذيل رمية المقرات ، واتجاهات الاجهزه.  Tail rotor hub, set screws and lock nuts . المحور الدوار الذيل ، مجموعة براغي والمكسرات لوك. 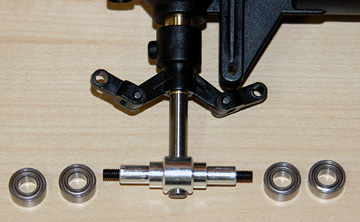 Place the tail rotor hub onto the tail rotor shaft. The shaft has dimples to receive the set screws. It is very important that the set screws engage them. مكان الذيل على محور دوار الذيل الدوار رمح. الدمامل وقد فان رمح لاستقبال مجموعة البراغي. ومن المهم جدا ان مجموعة براغي اشراكهم. The best way to do it is to insert only one set screw, tighten it until it just contacts the shaft. Back it off a half turn and then try to rotate the hub. If you can rotate the hub only a couple degrees in each direction before it hits stops then the set screw is in the dimple and can be tightened. افضل طريقة لذلك وهي تضاف الى مجموعة واحدة فقط المسمار ، وتشديد الرقابة عليه حتى مجرد اتصال رمح. دعمه من نصف وانتقل بعد ذلك الى محاولة تدوير المحور. إذا كان يمكنك تدوير محور إلا بضع درجات في كل اتجاه قبل ان تصل الى توقف بعد ذلك مجموعة برغي في غمازه ويمكن ان تكون ضيقة. Insert the second set screw and tighten them both securely. Be sure to use Loctite on both set screws. تضاف المجموعة الثانية المسمار وتشديد امن لهم على حد سواء. التأكد من استخدام loctite مجموعة البراغي على حد سواء. 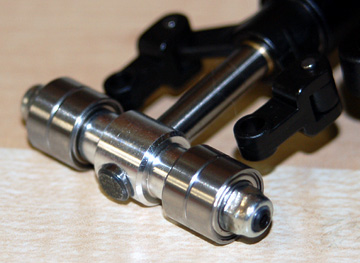 Replace the bearings, add the lock nuts and tighten them securely. يستعاض عن الاتجاهات ، اضافة القفل والمكسرات وتشديد بصورة آمنة. 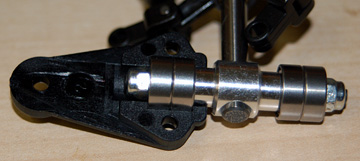 Place one tail pitch housing over the bearings. مكان السكن رمية واحدة الذيل على مدى الاتجاهات. 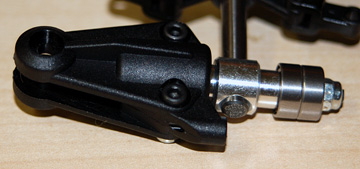 Place the mating tail pitch housing on the bearings. وضع الذيل التزاوج رمية الاسكان على الاتجاهات. 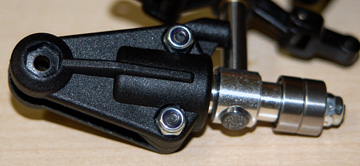 Press the lock nuts into the recesses and bolt the housing together. الصحافة القفل البندق الى التعطيل والاسكان والترباس معا. Repeat for the second housing set. اكرر للمجموعة الثانية والاسكان. 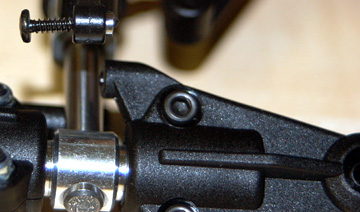 Insert a collar and self-tapping screw into each of the tail pitch control links. يضاف الياقه والتنصت على المسمار الذاتي في كل من درجة السيطرة على وصلات الذيل. 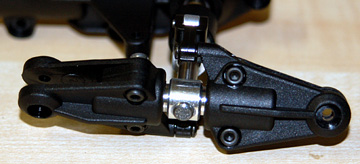 Note that the link is in front of the leading edge of the tail rotor blade. This is the correct orientation when viewed from the right side of the helicopter. نلاحظ ان الربط هو في قيادة الجبهة من حافة الذيل شفره الدوار. وهذا هو التوجه الصحيح عندما ينظر اليها من الجانب الايمن من الطائرة العموديه. 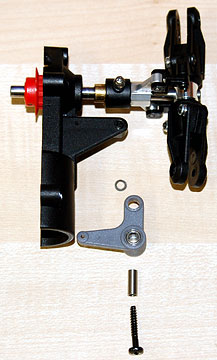 Turn the housing upside down to mount the tail pitch control lever . Note the small washer . تحويل الاسكان الى جبل مقلوب الذيل درجة السيطرة على العتله. ملاحظه صغيرة الغساله. Thread a ball on the tail pitch control slider. الخيط الكرة على درجة السيطرة على شريط التمرير الذيل. Insert a bearing into each side of the tail pitch control lever. وإذ تضع يضاف الى كل جانب من السيطرة على درجة رافعه الذيل. 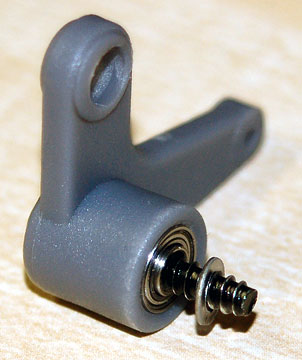 Insert the collar into the tail pitch control lever. Note which side the screw is inserted from. تضاف الى الياقه الذيل درجة السيطرة على العتله. المذكره عن الجانب الذي هو المسمار من أدراج. The washer goes between the bearing in the tail pitch control lever and the tail unit housing. وغني عن الغساله بين وإذ تضع في الذيل درجة السيطرة على رافعه والذيل وحده سكنيه. 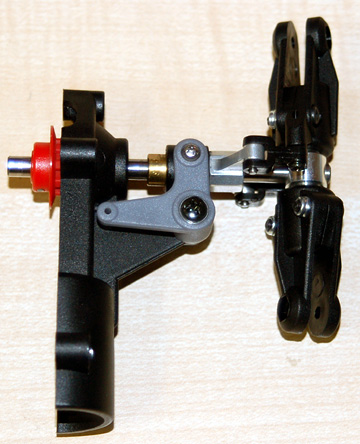 Place the larger hole in the lever over the ball in the tail pitch control slider. مكان الثقب الاكبر في اكثر من رافعه الكرة في الملعب السيطرة على شريط التمرير الذيل. Screw the lever in place. برغي في مكان العتله. 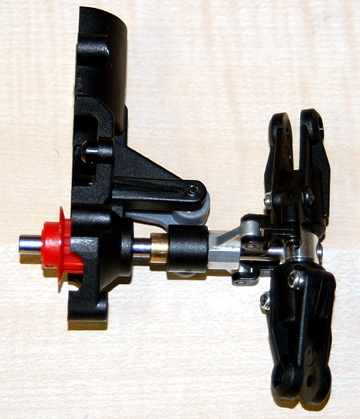 The top of the right tail rotor housing assembly.
|
|||
|
|
| مشاركة [ 10 ] | ||||
|
||||
|
|
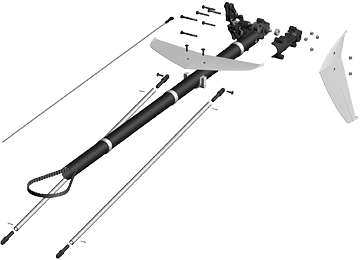 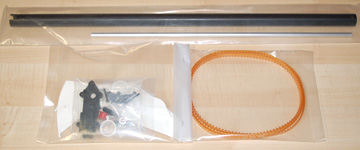 Parts bags for this assembly. أجزاء اكياس لهذه الجمعية. 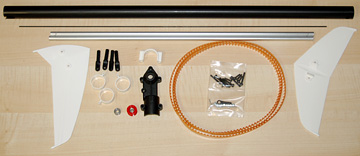 Parts for the tail boom assembly. قطع الغيار اللازمة لازدهار الجمعية الذيل. 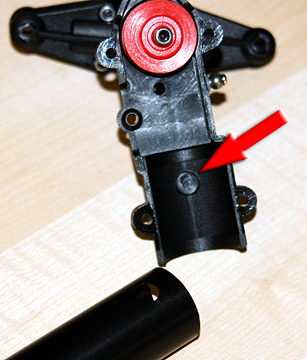 The tail unit housing has a plastic pin molded in that engages a hole in the tail boom . الذيل وحده سكنيه قد يعلقون مصبوب من البلاستيك في ان يشرك ثقب في ذيل الازدهار. 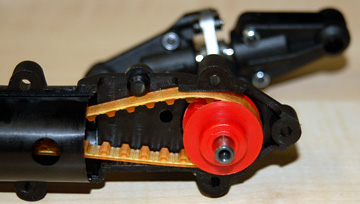 Feed the tail rotor drive belt into the tail boom before adding the tail unit assembly. تغذية الذيل حملة الحزام الدوار في الذيل الازدهار قبل اضافة الذيل وحدة الجمعية. Sight down the tube to make sure the belt isn't twisted. البصر الى اسفل الانبوب للتأكد من الحزام لا الملتويه. Add the tail unit assembly and place the belt over the tail pulley . يضاف الذيل وحدة الجمعية ومكان الحزام على مدى بكرة الذيل. 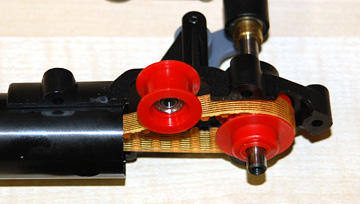 Add the tail idle pulley . يضاف الذيل بكرة الراكد. 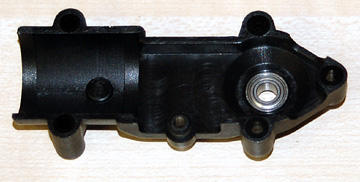 Insert the bearing into the left tail unit housing . وإذ تضع تضاف الى ترك الذيل وحده سكنيه. 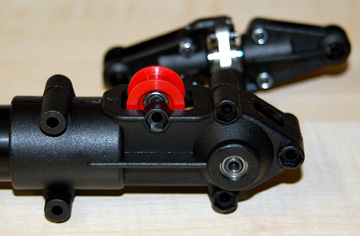 Place the left tail unit housing on the tail boom. مكان اليسار الذيل وحده سكنيه على ذيلها الازدهار. 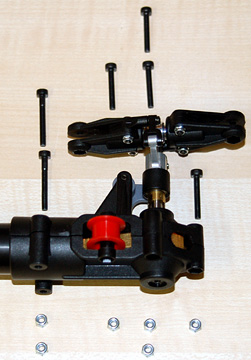 Hardware to attach the tail unit housings to the tail boom. أجهزة لنعلق على المقرات وحدة ذيل الذيل الازدهار. Note that the two left-most bolts are longer than the other four. The vertical fin is attached by the two longer bolts. علما ان اثنين من اليسار معظم مسامير هي أطول من الاربع الاخرى. الراسي وفنلندا هي التي توليها البلدين يعد للمسامير. 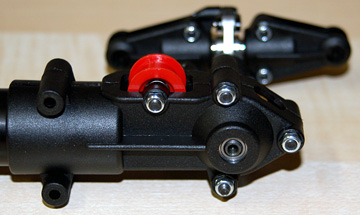 Press four lock nuts into the recesses in the left tail unit housing. Use the four shorter hex bolts to bolt the tail housing together on the tail boom. الصحافة اربعة قفل الجوز الى الاستراحه في ترك الذيل وحده سكنيه. استخدام الهيكس اقصر أربعة مسامير لالترباس الذيل الاسكان معا على الذيل الازدهار. 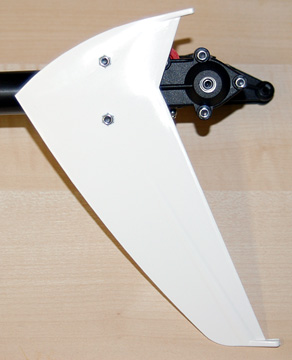 Press two lock nuts into the fin and bolt it to the tail unit housing using the two longer hex bolts. الصحافة اثنين قفل الجوز الى فنلندا والترباس الى الذيل وحده سكنيه باستخدام الهيكس اثنين يعد للمسامير. If you plan to use the included decals they are easiest to apply before the fin is attached. The same is true for the stabilizer fin . اذا كنت تخطط لاستخدام شارات شملت انها أسهل لتطبيق امام فنلندا ومرفقة. وينطبق الشيء نفسه على مثبت لفنلندا. 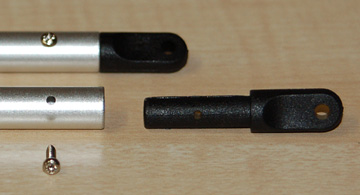 Insert the four tail support rod ends into the two tail support rods . Use the self-tapping screws to secure them. تضاف اربعة الذيل دعم رود تنتهي الى الذيل دعم اثنين من قضبان. الاستخدام الذاتي والاستفادة منها لتأمين البراغي. I suggest that you do not glue these into the rods as it isn't necessary. If you use CA and the glue sets up before you get them inserted in the proper position you'll have a problem. واقترح ان كنت لا الغراء الى هذه القضبان كما انها غير ضروريه. إذا كنت تستخدم الصمغ كاليفورنيا وقبل ان يضع لك منها يدرج في الموقف الصحيح لديك مشكلة. At this point the instructions indicate the stabilizer fin should be attached to the tail boom along with the two tail support rods. The rods will be in the way so we're going to add them later. وعند هذه النقطه تشير التعليمات مثبت وفنلندا وينبغي ان ترفق الذيل الازدهار جنبا الى جنب مع اثنين من قضبان الدعم الذيل. القضبان سيكون في طريقه لذلك نحن ذاهبون الى اضافتها في وقت لاحق. |
|||
|
|
| مشاركة [ 11 ] | ||||
|
||||
|
|
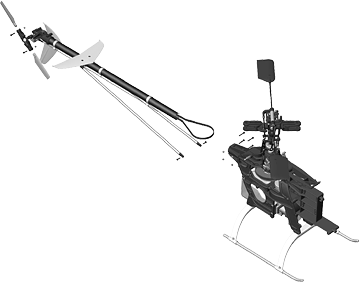 It's time to attach the tail boom to the main frame. There are two things that can go wrong here: لقد حان الوقت لتولي الذيل الازدهار الى الاطار الرئيسي. هناك امران يمكن ان خطأ هنا :
There is an easy way to ensure the belt is oriented correctly. وهناك طريقة سهلة لضمان حزام توجه بشكل صحيح. Before you attach the tail boom, turn the boom so the right side is down. That means the tail rotor blades are on the work surface (if you have attached them) and the boom is above them. قبل ان نعلق الذيل الازدهار ، وذلك بدوره الازدهار في الجانب الايمن من هو أسفل. وهذا يعني ان الذيل ريش الدوار على سطح العمل (اذا كان لديك يعلق عليها) والازدهار هو فوقها. Make sure the belt is not twisted in the boom. The belt should be horizontal to the work surface. تأكد الحزام لا الملتويه في الازدهار. الحزام ينبغي ان يكون افقيا على سطح العمل. Hold the end of the belt that goes into the frame to prevent it from turning. Turn the boom 90 ° so that it is oriented properly having the tail rotors on the right side of the helicopter. عقد نهاية الحزام الذي يذهب الى اطار لمنعها من تحويل. بدورها الازدهار حتى 90 درجة انها موجهة نحو سليم بعد ان الذيل الدوار على الجانب الايمن من الطائرة العموديه. 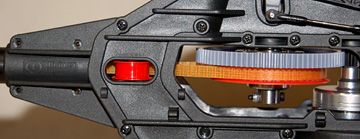 Pull the tail belt drive into the frame while pushing the tail boom into the frame as far forward as it will go. Place the belt over the gear on one side. Turn the gear to work the belt onto it. إسحب الذيل حملة الحزام في حين ان الاطار الذي دفع الازدهار في ذيل الاطار وفيما يتعلق الامام لانه سيذهب. مكان الحزام على مدى والعتاد على جانب واحد. تحويل المعدات للعمل على الحزام. Viewing the helicopter from above, rotate the rotor head in a clockwise direction. The tail rotor should turn counter-clockwise when viewed from the right. مشاهدة الطائرة من فوق ، وتناوب رئيس الدوار في اتجاه عكس عقارب الساعة. الذيل الدوار مكافحة الارهاب ينبغي أن نحول اتجاه عقارب الساعة عند النظر اليها من هذا الحق. If the tail rotor turns clockwise then the belt is turned the wrong way. Correct it before moving on. واذا كان الذيل الدوار وينتقل بعد ذلك في اتجاه عقارب الساعة الحزام ادار هذا الطريق الخاطئ. تصحيحه قبل الانتقال. 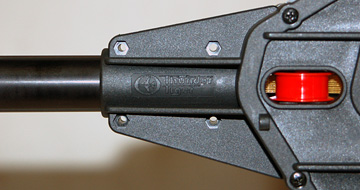 Four lock nuts go in these recesses in the right frame. اربعة قفل الجوز الذهاب في هذه الاستراحه في الاطار الصحيح. 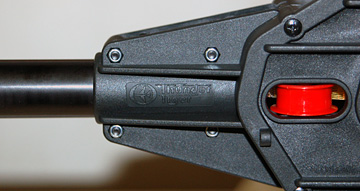 Press the lock nuts into the recesses. Insert the hex bolts through the other side of the frame. Pull the tail boom to tauten the belt and tighten the bolts. الصحافة القفل البندق الى الاستراحه. تضاف الهيكس مسامير من خلال الجانب الآخر من الاطار. اسحب الذيل الازدهار لtauten الحزام وتشديد مسامير. The instructions indicate the belt should not be able to be pressed in more than 3/16". I have no idea how to measure that and took my best guess at how tight the belt should be. On the first run I could hear a "ting" noise inside the boom which indicated the belt was too loose and striking the boom. I loosened the bolts and pulled the boom tighter until the noise went away. وتشير التعليمات الحزام ينبغي ان لا تكون قادرة على ان يكون الضغط في اكثر من 3 / 16 ". ليس لدي فكرة كيف يمكن قياس ذلك واتخذت بلادي افضل تخمين في الحزام الضيق كيف ينبغي ان تكون عليه. البعيد عن اول يمكنني ان تستمع" تينغ "الضوضاء داخل الازدهار الذي اشار الى حزام فضفاضة للغاية وضرب الازدهار. loosened الاول الترابيس وسحبت ازدهار أشد حتى ذهب بعيدا من الضجيج. 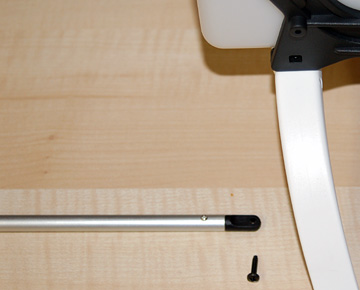 Attach the two tail support rods to the main frame at the bottom near the rear skid. نعلق اثنين من قضبان الذيل لدعم الاطار الرئيسي في اسفل بالقرب من العمق التزلج. 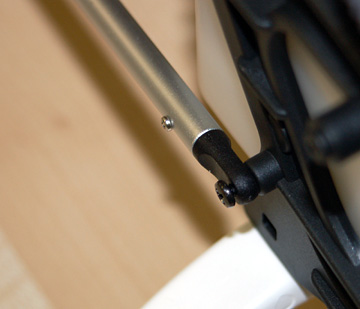 Tighten the screws until they are just snug then back them out about one turn. You want them as tight as you can make them while still allowing the rods to pivot on the bolts. تشديد براغي حتى انها مجرد ركن الحانة ثم العودة بها عن واحد بدوره. تريد ان تضيق كما يمكنك ان تجعل منهم في حين لا يزال يسمح لقضبان المحور على مسامير. 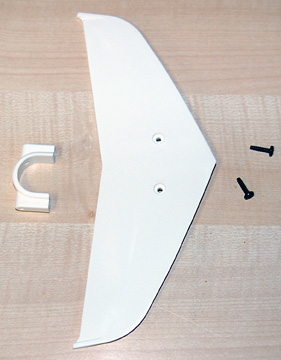 The stabilizing fin , stabilizing fin bracket and self-tapping screws . وفنلندا والاستقرار ، وتحقيق الاستقرار وفنلندا وشريحة الذاتي والاستفادة من البراغي. 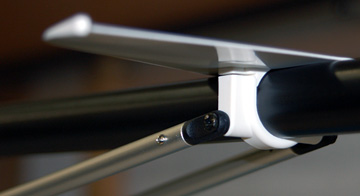 Place the bracket on the boom from underneath. Use the two self-tapping screws to attach the stabilizing fin to the bracket. Leave the screws loose for now. وضع شريحة على الازدهار من تحت. استخدام اثنين الذاتي والاستفادة من براغي لتثبيت وفنلندا ونعلق على شريحة. مغادرة البراغي واهية في الوقت الحاضر. Attach the two support rods to the bracket. Leave these screws loose as well. نعلق اثنين من قضبان الدعم لشريحة. مغادرة هذه البراغي فضفاضة ايضا. Now tighten all the screws as much as possible while still being able to adjust everything. الآن تشديد جميع البراغي قدر الامكان بينما لا تزال قادرة على التكيف مع كل شيء. Sight the helicopter from the rear and ensure the fin is horizontal. When you are satisfied, tighten the screws at both ends of both rods. الأفق طائرة الهليكوبتر من العمق وضمان وفنلندا والافقي هو. عندما تكون راضيا ، وتشديد البراغي على طرفي كل من قضبان. Alternate tightening the two screws attaching the fin to bracket. If you tighten one screw all the way first and then the second screw the fin will cant toward the side that was tightened first. مناوب تشديد اثنين البراغي التي ارفقت بها لشريحة وفنلندا. تشديد اذا كنت واحدة كل برغي الطريقة الاولى والثانية ثم فإن المسمار وفنلندا وسوف الرطانه في اتجاه تشديد وهذا هو الجانب الاول. Go back and securely tighten the screws holding the support rods to the frame. العودة بأمان وتشديد براغي عقد القضبان لدعم الاطار. 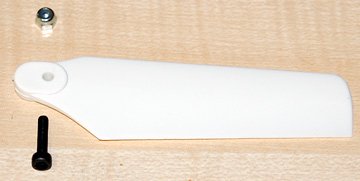 The tail rotor blades are attached with hex bolts and lock nuts. الذيل ريش الدوار مرفقة مع الهيكس مسامير وقفل الجوز. When viewed from the right side of the helicopter, the tail rotor turns counter-clockwise. عندما ينظر اليها من الجانب الايمن من الطائرة ، الذيل الدوار تتحول مكافحة الارهاب في اتجاه عقارب الساعة. Be sure to mount the blades facing the correct direction. ومن المؤكد أن لجبل الشفرات التي تواجه الاتجاه الصحيح. 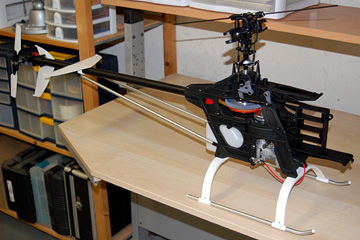 It's finally starting to look like a helicopter. وأخيرا أنها بدأت تنظر مثل طائرة هليكوبتر. From this point on you should work in a clear area that has enough room to swing the heli around which is something you'll need to do several times. من هذه النقطه عليك ان تعمل في مجال واضح ان لديها ما يكفي من غرفة الى حوالى heli فإن البديل وهو ما عليك ان تفعل عدة مرات. If you work in a space like the one shown here you'll quickly become frustrated by having to duck the tail boom while swinging it over your hear and trying to avoid smacking it into something else. اذا كنت تعمل في الفضاء كالذي يظهر هنا يمكنك سرعان ما أحبط من قبل ان تضطر الى بطة الذيل الازدهار بينما يتأرجح فوق الخاصة بك والاستماع الى محاولة تجنب صفع الى شيء آخر. I ignored my own advice because I was uncomfortable with how smoothly things were going and I didn't have an excuse to swear all day. الاول تجاهل المشوره بلدي لانني كنت منزعجا من الطريقة التي تسير الامور بسلاسه وانا ليس لديها حجة لأ |
|||
|
|
| مشاركة [ 12 ] | ||||
|
||||
|
|
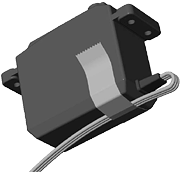 Note that the balls are mounted to servo arms and the throttle arm using machine screws and hex nuts . علما ان الكرات هي التي شنت على الماكينه المساعدة الاسلحة وخنق الذراع باستخدام آلة براغي والمكسرات الهيكس. Be sure to Loctite this hardware so it doesn't vibrate loose. ومن المؤكد ان لهذه الاجهزه loctite كي لا زتهيل فضفاضة. 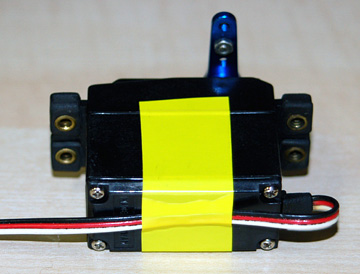 Use a good quality tape to secure the lead to the bottom of the aileron servo . Be sure the lead isn't strained where it exits the case. استخدام الشريط الجيد لضمان ان يؤدي الى الجزء السفلي من الماكينه المساعدة المءخره. تأكد انه لا يؤدي الى ارهاق فيها مخارج القضية. 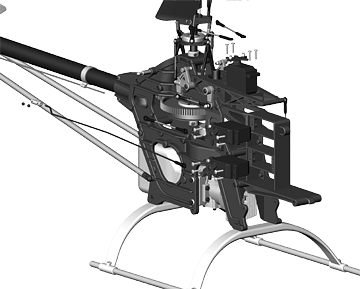 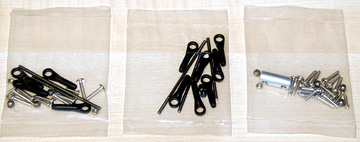 Parts bags for this assembly. أجزاء اكياس لهذه الجمعية. 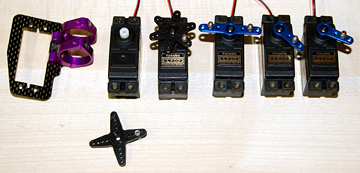 Servos and a tail boom mount for the tail rotor servo. This is the only upgrade I suggest for your heli. When I built my first Raptor there was too much drag in the stock setup. The setup is essentially the same in the new Raptor so I didn't even attempt to use it. الماكينات المساعدة والازدهار في ذيل الذيل جبل لالدوار الماكينه المساعدة وهذا هو فقط لرفع مستوى اقترح heli الخاص بك. انني عندما بنى اول raptor كان هناك الكثير من السحب في الاسهم الاعداد. الاعداد هي نفسها اساسا في المناطق الجديدة حتى raptor لم أكن مجرد محاولة لاستخدامها. If you want to use the stock setup then you're on your own because it will not be covered in this article. I'm sure a lot of pilots have gotten it to work fine. اذا كنت تريد استخدام الأسهم في الاعداد ثم انت بنفسك لأنه لن تكون مشموله في هذه المادة. انا متأكد الكثير من الطيارين الى أنها بدأت تعمل جيدا. 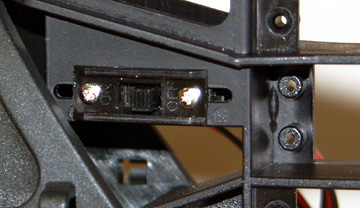 Mounting the receiver switch is actually part of the next step , but it's easiest to install before the servos so go ahead and install it in the molded mount on the right side of the servo frame. تركيب جهاز الاستقبال التحول هو في الواقع جزء من الخطوة التالية ، الا انها أسهل لتركيب الماكينات المساعدة حتى قبل المضي قدما في تثبيت وانه مصبوب في جبل على الجانب الايمن من الماكينه المساعدة الاطار. 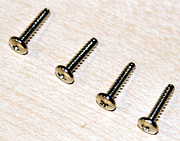 Servo mounting screws . الماكينه المساعدة المتصاعده البراغي. 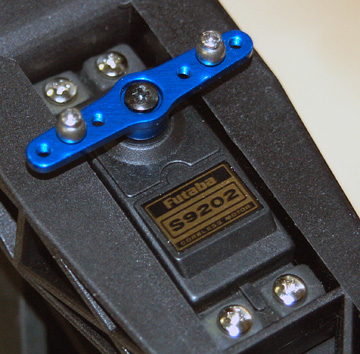 Mount the aileron servo to the top of the collective pitch control arm . جبل المءخره فان الماكينه المساعدة الى اعلى درجة من السيطرة على الذراع الجماعية. All servos mount with the output shaft toward the rear of the helicopter. جبل لجميع الماكينات المساعدة مع الناتج رمح نحو مؤخرة الطائرة العموديه. 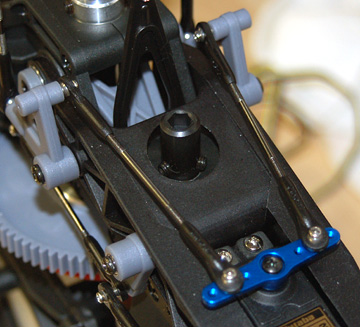 Make two 73 mm aileron linkages and connect them to the aileron servo and the aileron control levers . ابدى ملاحظتين 73 ملم المءخره الروابط وربطها الماكينه المساعدة الى المءخره والعتلات الرقابة المءخره. This is when I realized I had mounted the aileron control levers with the balls on the outside instead of the inside. Instead of changing the location of the balls I simply swapped the levers. هذا هو عندما كنت ادرك انني قد نفذا المءخره مع العتلات السيطرة على الكرات خارج بدلا من الداخل. بدلا من تغيير موقعه من الكرات أنني ببساطة مبدل العتلات. 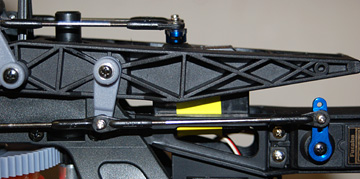 Mount the elevator servo in the top opening of the servo frame . جبل المصعد الماكينه المساعدة في افتتاح اعلى من الماكينه المساعدة الاطار. Make the 86 mm elevator linkage and connect it to the elevator servo and the elevator control lever . جعل الربط مصاعد 86 ملم وربطها الى المصعد والماكينه المساعدة المصعد مراقبة العتله. 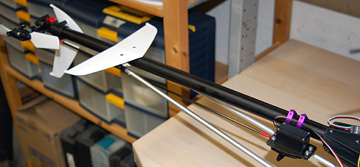 If you use a tail boom mount for the tail rotor servo mount it well forward on the boom. اذا كنت تستخدم الذيل ازدهار جبل لجبل ذيل دوار جيدا الماكينه المساعدة الى الامام على طريق الازدهار. 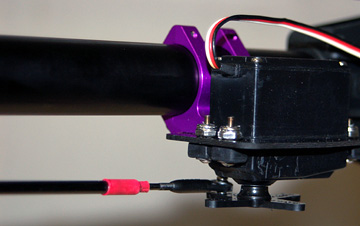 You'll have to make a pushrod the correct length. I used carbon fiber tube with threaded rod epoxied into both ends. سيكون لديك لتقديم pushrod الصحيح طول الأول من انبوب يستخدم الكربون والألياف مع مخيط رود epoxied الى كل من الغايات. 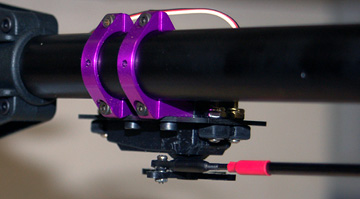 Another view of the tail rotor servo, mount and pushrod. رأي آخر من الماكينه المساعدة الذيل الدوار ، وجبل pushrod. Step Seventeen — Servo Installation - Part 2 الخطوة السابعه -- تركيب الماكينه المساعدة -- الجزء 2
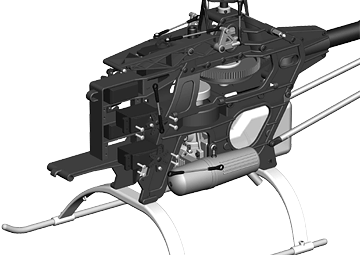 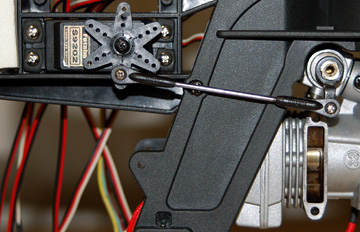 The throttle servo is installed on the left side of the frame in the lowest hole. وقد خنق الماكينه المساعدة مثبتا على الجانب الايسر من الاطار في ادنى ثقب. Connect a ball to the servo arm and the throttle arm. توصيل الكرة الى الماكينه المساعدة الذراع وخنق الذراع. Make a 75 mm pushrod and connect the servo to the throttle. تقديم عيار 75 ملم وpushrod ربط الماكينه المساعدة الى خنق. Ray Hostetler's book covers throttle linkage geometry in detail and is suggested reading. شعاع Hostetler كتاب يغطي خنق الربط الهندسه في التفصيل ويقترح قراءة. 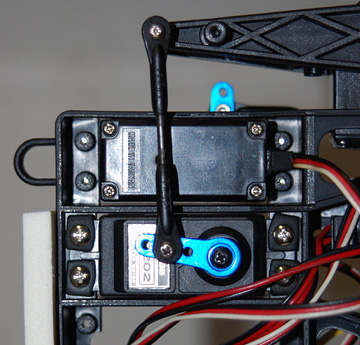 The pitch servo goes in the second hole from the top on the left side of the frame. وغني عن رمية الماكينه المساعدة في الثانية فتحه من اعلى على الجانب الايسر من الاطار. Screw a ball to the servo arm. Make a 51 mm pushrod and connect the pitch servo to the collective pitch control arm . برغي الكرة الى الماكينه المساعدة الذراع. تقديم 51 مم pushrod وربط الماكينه المساعدة الى رمية رمية الجماعية ذراع التحكم. At this point all the servos should be installed and all linkages should be connected. Note that the length of the linkages given in the manual are starting points. The output shaft of your servos may not be in the same location as the servos used when the helicopter was designed. It is almost 10% that you will need to adjust many of the linkages to get the correct control geometry of your helicopter. وعند هذه النقطه جميع الماكينات المساعدة ينبغي ان يتم تركيب جميع الروابط وينبغي ان يكون مرتبطا مع الاشارة الى ان طول ونظرا للروابط في الدليل هي نقطة الانطلاق. ناتج رمح الخاص بك الماكينات المساعدة قد لا تكون في ذات المكان الذي تستخدم فيه الماكينات المساعدة وقد صممت طائرات الهليكوبتر ، وهو ما يقرب من 10 ٪ التي سوف تحتاج الى تعديل العديد من الروابط الصحيحه للحصول على السيطرة على هندسة الطائرات العموديه الخاصة بك. |
|||
|
|
| مشاركة [ 13 ] | ||||
|
||||
|
|
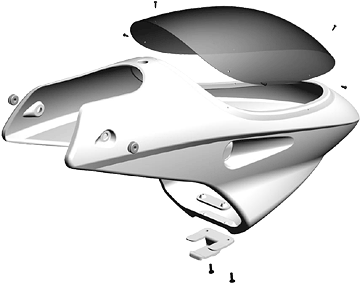 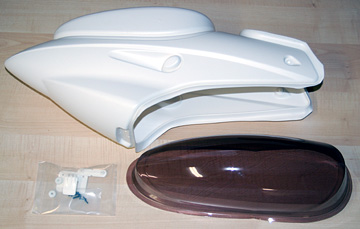 Parts for the body/canopy assembly. لاجزاء الجسم / مظله الجمعية. 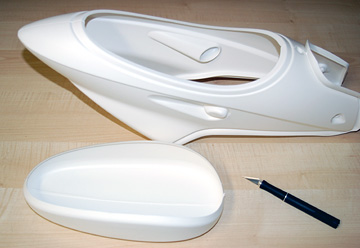 There is a deep "V" molded into the body . Use a sharp X-Acto knife to cut the excess from the body. وثمة العميق "الخامس" مصبوب في جسد. استخدام حاد x - acto السكين الى قطع الزائد من الجسم. Several light cuts work better than trying to cut all the way through in one shot. العديد من التخفيضات فى ضوء عملها على نحو افضل من محاولة لقطع الطريق على جميع من خلال طلقة واحدة في. Save the excess for testing paint if you plan to paint the body. The plastic is bleach bottle material that a lot of paints won't adhere to. انقاذ الزاءده لاختبار الطلاء اذا كنت تخطط لطلاء الجسم. البلاستيكيه زجاجة مواد التبييض هو ان الكثير من الاصباغ لن تلتزم. I've read that primer for rubber car bumpers works, but I'm going to test before trying it on the actual body. لقد قمت قراءة اولية لالمطاط ان سيارة تعمل ممتصات الصدمه ، ولكن انا ذاهب لاختبار قبل محاولة الفعليه على الهيءه. It's not just if the primer sticks but also if the paint I use is compatible with the primer. انها ليست فقط اذا كانت الشعيله العصي ولكن أيضا اذا كان استخدام الطلاء الاول متوافقا مع الإشعال. 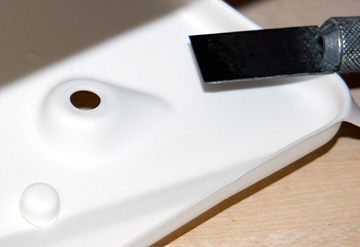 Cut the nubs from the inside rear of the canopy where the grommets will be mounted. Use a fine file or fine sandpaper around a dowel to smooth the edge. قطع الألباب من داخل العمق من المظله حيث يعقد الحلقات. استخدام الملف او غرامة غرامة ورق الصقل حول المسمار السلس الى الحافه. Be sure to sand all edges of the body for neatness and to help prevent it from cutting anything that may rub against it. تأكد ان جميع حواف الرمل من الجسم لوالترتيب للمساعدة على منع اي شيء من القطع التي يمكن ان التدليك ضده. 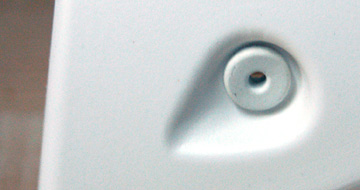 Grease the inside and outside of the rubber grommets using non-petroleum grease. Insert them into the body. الشحوم الداخلية والخارجية للحلقات المطاط غير البتروليه باستخدام الشحوم. تدرج في جسد. Open Open the air inlet holes on each side. The only way to the receiver switch is through the air inlet on the right side of the body. فتح فتح فتحة الهواء ثقوب على كل جانب. السبيل الوحيد لجهاز الاستقبال هو التحول عن طريق الهواء فتحه على الجانب الأيمن من الجسم. 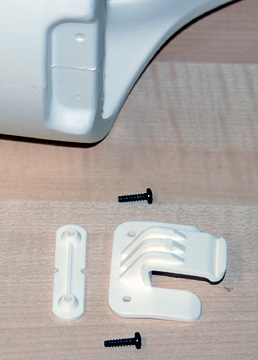 Body Clip A (right) and B (left) with hardware. هيئة لقطة (يمين) وب (الى اليسار) مع الاجهزه. 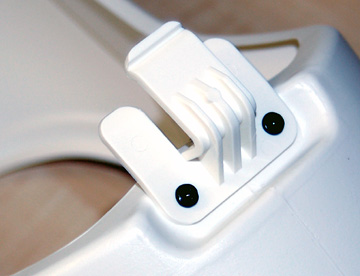 Use an awl or a small drill bit to open the dimples on the bottom of the body. استخدام الخرامه او لقمة الحفر الصغيرة لفتح الدمامل على الجزء السفلي من الجسم. Use the two self-tapping screws to thread body clip A on the outside of the body. استخدام اثنين الذاتي التنصت على هيئة خيط براغي لقطة على السطح الخارجي للهيئة. 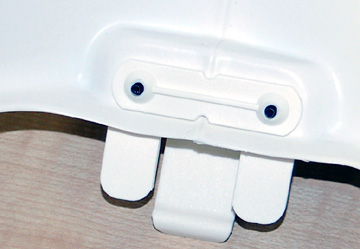 Place body clip B inside the body and tighten the screws. Just snug is good. Don't strip the plastic. ب الهيءه كليب مكان داخل الجسم وتشديد البراغي. ركن الحانة عادل حسن. لأ الشريط البلاستيك. 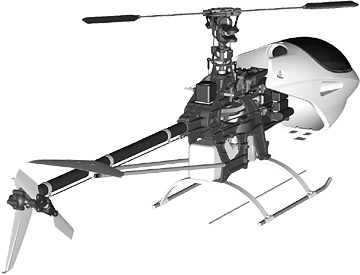 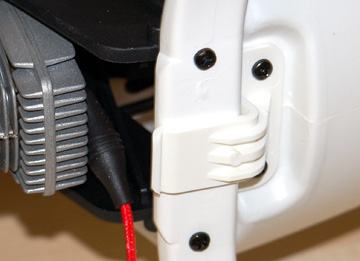 The clip slides over the front landing gear . كليب والشرائح تهبط أكثر من جبهة والعتاد. 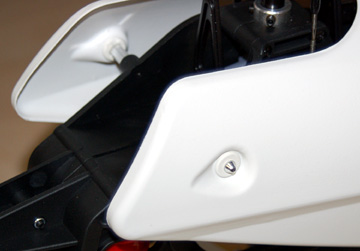 Spread the body in the rear and push the grommets over the posts. Greasing the grommets makes it easier. انتشار الهيءه في المءخره ، ودفع على مدى الحلقات وظيفة. الدهن فإن الحلقات انه يجعل من الاسهل. Once you run the engine a time or two the whole heli will be nice and oily and the body can be removed and replaced easily. وبمجرد تشغيل محرك مرة او اثنان الجامعة heli سيكون لطيف والتقاوى والجسم ويمكن ازالتها واستبدالها بسهولة. 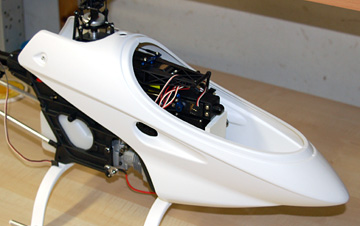 It's easiest to mount the canopy to the body with body mounted to the heli, so just leave it in place. انه اسهل على جبل المظله الى الهيءه مع الهيءه التي شنت على heli ، حتى انها تترك في مكان. 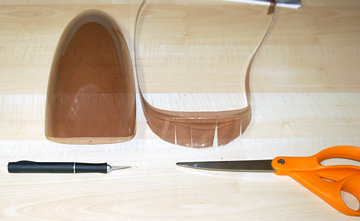 The canopy is a little more difficult to trim because it has a fine molded line. I worked seated under good light. هو المظله قليلا الى تقليم اكثر صعوبة لانها غرامة مصبوب الخط. عملت يجلس تحت ضوء جيد. Trim away most of the excess plastic using a scissor. تقليم بعيدا معظم الزياده من البلاستيك باستخدام scissor. Score the plastic along the line by making several passes with an X-Acto. البلاستيك نقاط على طول خط يمر من خلال عدة مع x - acto. Cut reliefs at the front and back of the plastic. Flex the plastic to break it free where you scored it. قطع في الانتصاف الأمامي والخلفي من البلاستيك. البلاستيك المرن لكسر فيها على انها كانت حرة وسجل لكم. Finally, use a sanding block with fine paper to finish the edge. وأخيرا ، استخدام كتلة التغطيه بالرمل مع الورق الناعم الى حافة النهاية. 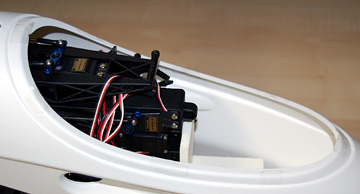 Apply several pieces of double-sided cellophane tape to the body where the canopy will mount. تطبيق عدة قطع من ضعف من جانب وشريط لاصق شفاف الى مظله الهيءه حيث سوف تتصاعد. 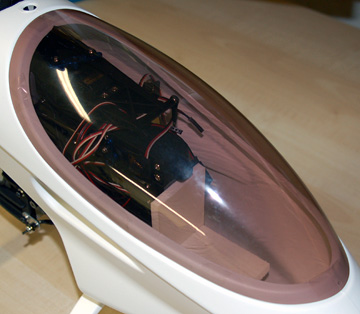 Place the canopy on body and align it. Press it against the tape. مكان المظله على الجسم ومواءمته. انها ضد الصحافة في الشريط. 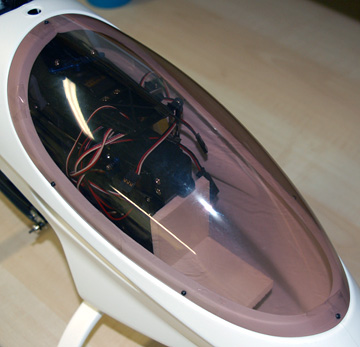
|
|||
|
|
| مشاركة [ 14 ] | ||||
|
||||
|
|
والله موضوع مميز عافاك الله و10 /10
|
|||
|
|
| مشاركة [ 15 ] | ||||
|
||||
|
|
شكر لك يا استاد
|
|||
|
|
| مشاركة [ 16 ] | |||
|
|||
|
تصاميم طائرات الريموت
|
waw جزاك الله الف خير
موضوع مدهش بحق |
||
|
|
| مشاركة [ 17 ] | ||||
|
||||
|
|
موضوع جميل يحتاج لدقة الترجمة ... الظاهر أنها ترجمة صفحات جوجل ..
بارك الله فيك أخي على اضافتك المهمة حيث يعد الموضوع شاغلا لاهتمامات الكثيرين ... |
|||
|
|
| مشاركة [ 18 ] | ||||
|
||||
|
|
مشكور اخي الكريم
|
|||
|
|
| مشاركة [ 19 ] | ||||
|
||||
|
|
رائع جداااااااااااااااااااااااااااااااااااااااااا
|
|||
|
|
| مشاركة [ 20 ] | ||||
|
||||
|
|
جهد مشكووور عليه يا محمد
ومتعوب عليه بس هذا من تصميم وانا اخوك هذا تجميع طيارة هيلي جاهزة والا لأ .. ؟؟ ربي يوفق الجميع انشاء الله |
|||
|
|
| مشاركة [ 21 ] | ||||
|
||||
|
|
ماشاء الله تبارك الله
|
|||
|
|
| مشاركة [ 22 ] | |||
|
|||
|
مخالف قوانين المنتدى
|
هذه صعبة اخي......ولكن شكرا
|
||
|
|
| مشاركة [ 23 ] | ||||
|
||||
|
|
موضوع رائع جزاك الله الجنة
|
|||
|
|
| مشاركة [ 24 ] | |||
|
|||
|
عضو خط الطيران
|
اخوي لو في احده في جده انا محتاج مراوح
|
||
|
|
| مشاركة [ 25 ] | |||
|
|||
|
عضو خط الطيران
|
يعطيك العافيه
|
||
|
|
| مشاركة [ 26 ] | ||||
|
||||
|
|
لي سؤال انا عايز اعمل طائرة مثل هذة بلظبط اريد شراء كل هذة المحتويات ما عدا الريموت وعايز اعرف اسعارها كام في مصر ارجوكم فيدوني وكم سعر الريموت السبع قنوات futaba 7ch
|
|||
|
|
| مشاركة [ 27 ] | ||||
|
||||
|
|
يمكن صنع بعض الاجزاء
|
|||
|
|
| مشاركة [ 28 ] | |||
|
|||
|
عضو خط الطيران
|
شكرا لك يا كابتن
|
||
|
|
| موضوع مغلق |
 قسم الطيران اللاسلكي AIRCRAFT R/C
|
|
|
|
|
|
 المواضيع المتشابهه
|
||||
| الموضوع | المنتدى | |||
| [FSX] حصريا: الطائرة الرائعة جدا AEROSOFT-PMDG 747X الإسطوانة الكاملة أحدث إصدار ( روابط جديدة جدا ) | محاكي FSX | |||
| اعطال الطائرات ... أسبابها ... أنواعها ... كيف نتعامل معها ...نقلل من حدوثها...ونمنع تكرارها ( الجزء الاول ) | هندسة وصيانة الطائرات Engineering & Aircraft Maintenance | |||
| (((البوم الصور الغريبة العجيبة + تعليقات ظريفة ...الجزء الاول))) | قسم الصور | |||
| صور منوعه رائعه جدا ..( الجزء الاول ) | قسم الصور | |||